Using the Web-to-Case functionality, ConvergeHub users can gather customer support requests directly from their company’s website . Setting up Web-to-Case involves creating the form, setting the form description, message, redirected URL, assigning a customer support professional, submitting button label and finally adding the Web-to-Case form to the website.
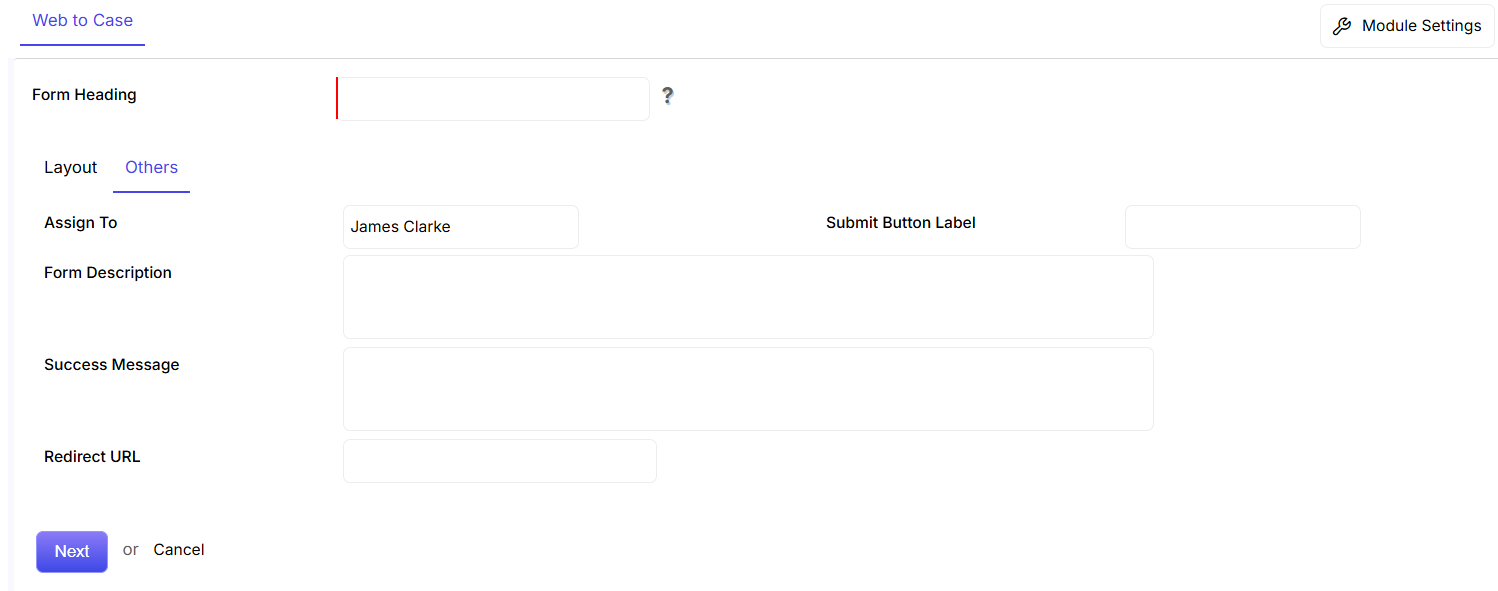
New Web to Case form can be added by clicking on the “Add New Web to Case” link in the left panel or by clicking on ![]() button in the upper right corner of the Web to Case listing page. Detailed information to the Web to Case form can be added through two sub tabs (Layout and Others) which have their own corresponding fields.
button in the upper right corner of the Web to Case listing page. Detailed information to the Web to Case form can be added through two sub tabs (Layout and Others) which have their own corresponding fields.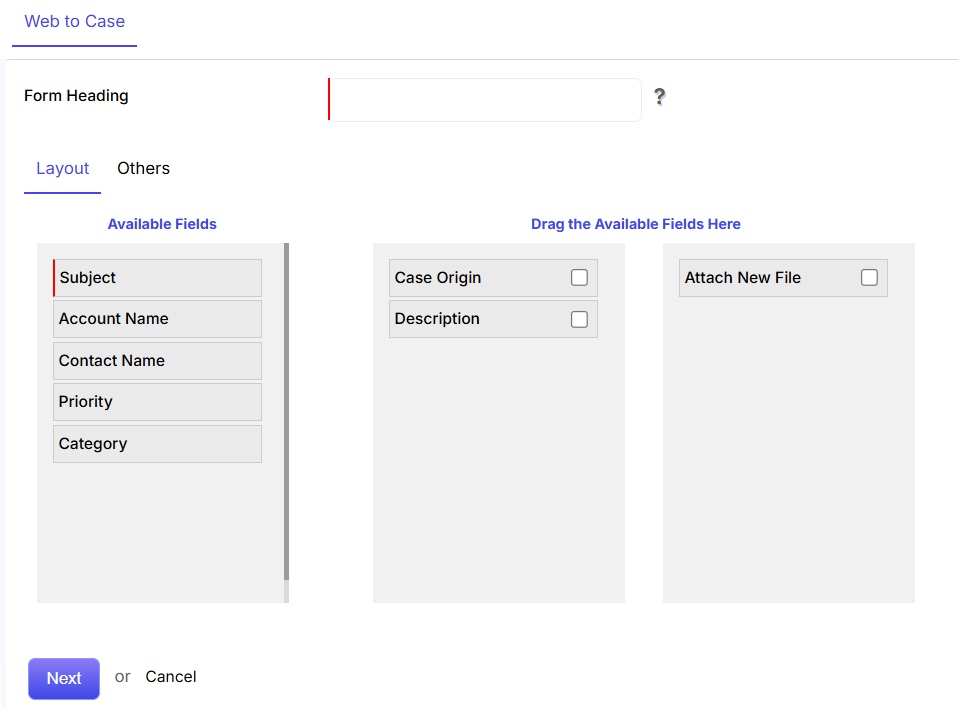
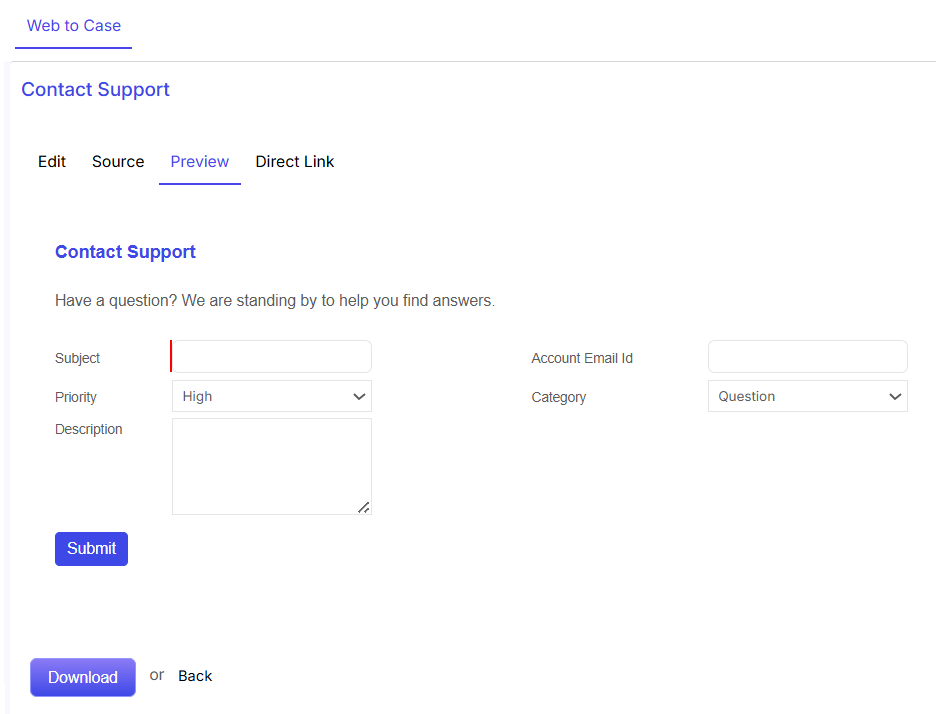
Click on Edit to make changes in the text of the form.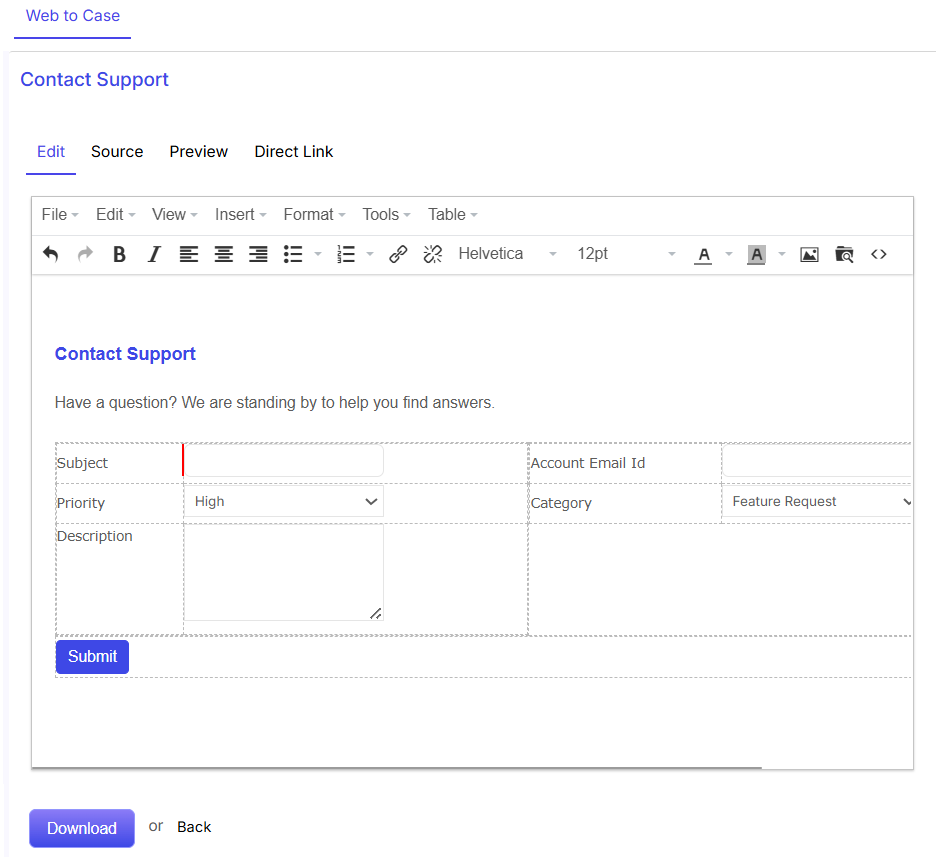
Customize the form by making changes in the Source code.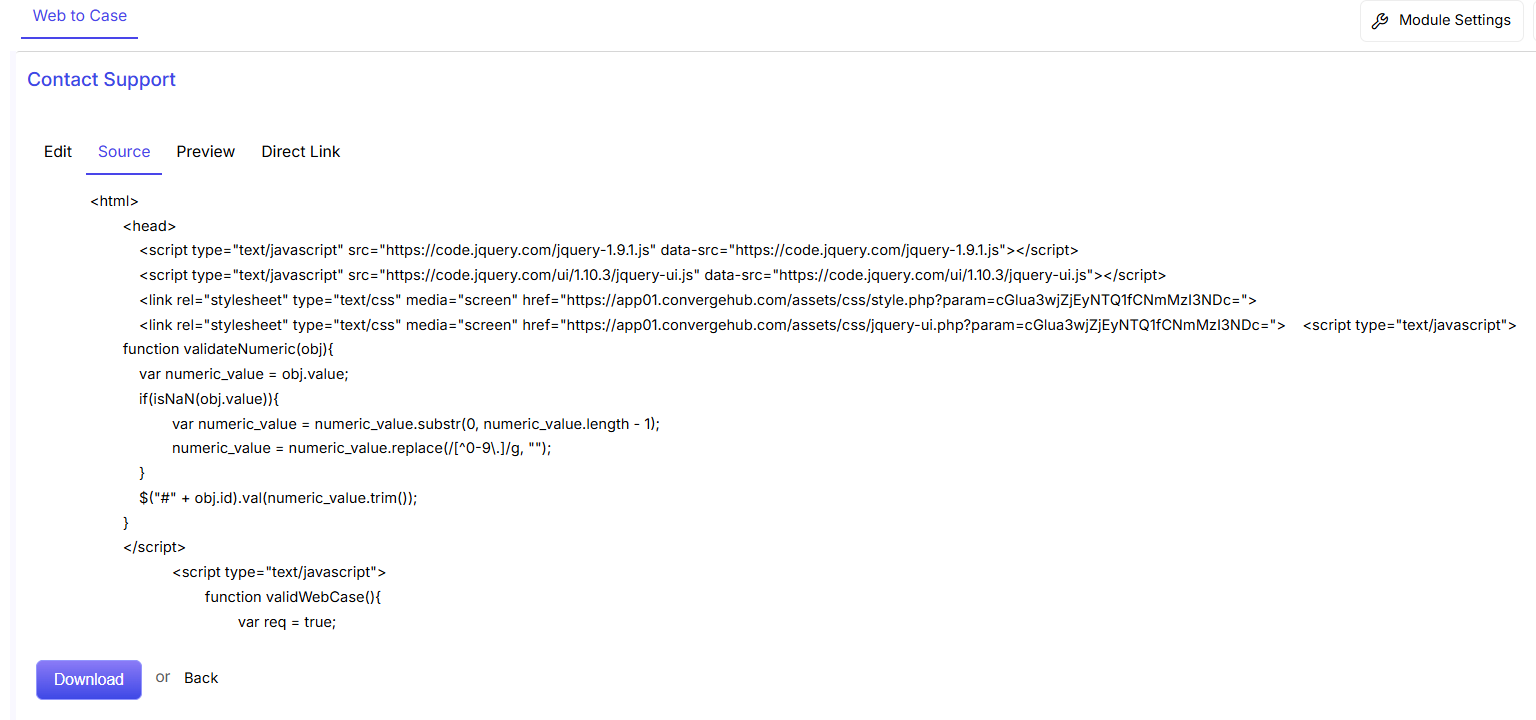
Click on Direct Link to copy paste the code into the website back-end.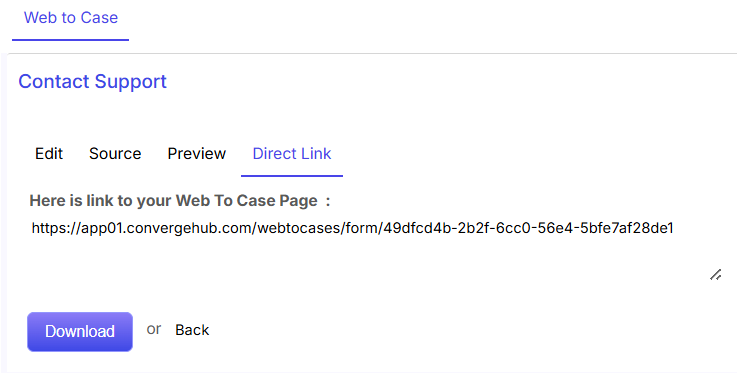
Click on Download option to open the form HTML page. Or else, click on Back to recede.