Web to Case forms can be edited by hovering the cursor on a Web to Case form in the listing page and clicking on the edit option.
Change the Form Heading.
Modify the Layout of the Web to Case form. Choose and then drag and drop the fields in the two columns.
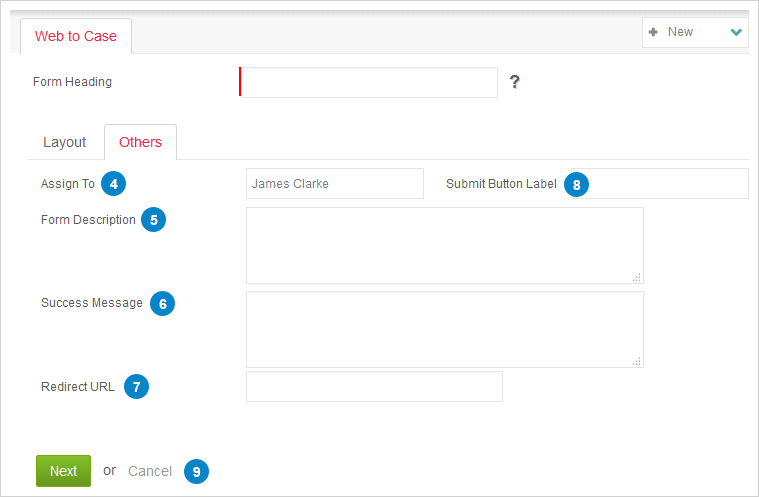
Click on Others to edit the remaining details of the form.
Change the agent to whom you would like to assign all the cases that get generated from the form.
Edit the text that you would like to have on the form submit button.
Edit the description to the form.
Edit the text that you would like the customer to get post the successful completion and submission of the form.
Give in another URL of the landing page where the customer will go to after the successful completion and submission of the form.
Click on Next to proceed further or else click on Cancel to stop form creation process.
Get a Preview to the form created.
Further customize the form by making changes in the Source code.
Click on Edit section to make more changes in the text of the form.
Click on Direct Link to copy paste the code into the website back-end.
Click on Download option to open the form HTML page. Or else, click on Back to recede.
This site uses cookies to store information on your computer. Some are essential to make our site work; others help us improve the user experience. By using the site, you consent to the placement of these cookies.Privacy Policyx