New Task

To start, go to Activities from the menu on the left and click on Task. Once you’re on the task list, you can create a new one by clicking the  button in the top-right corner. 
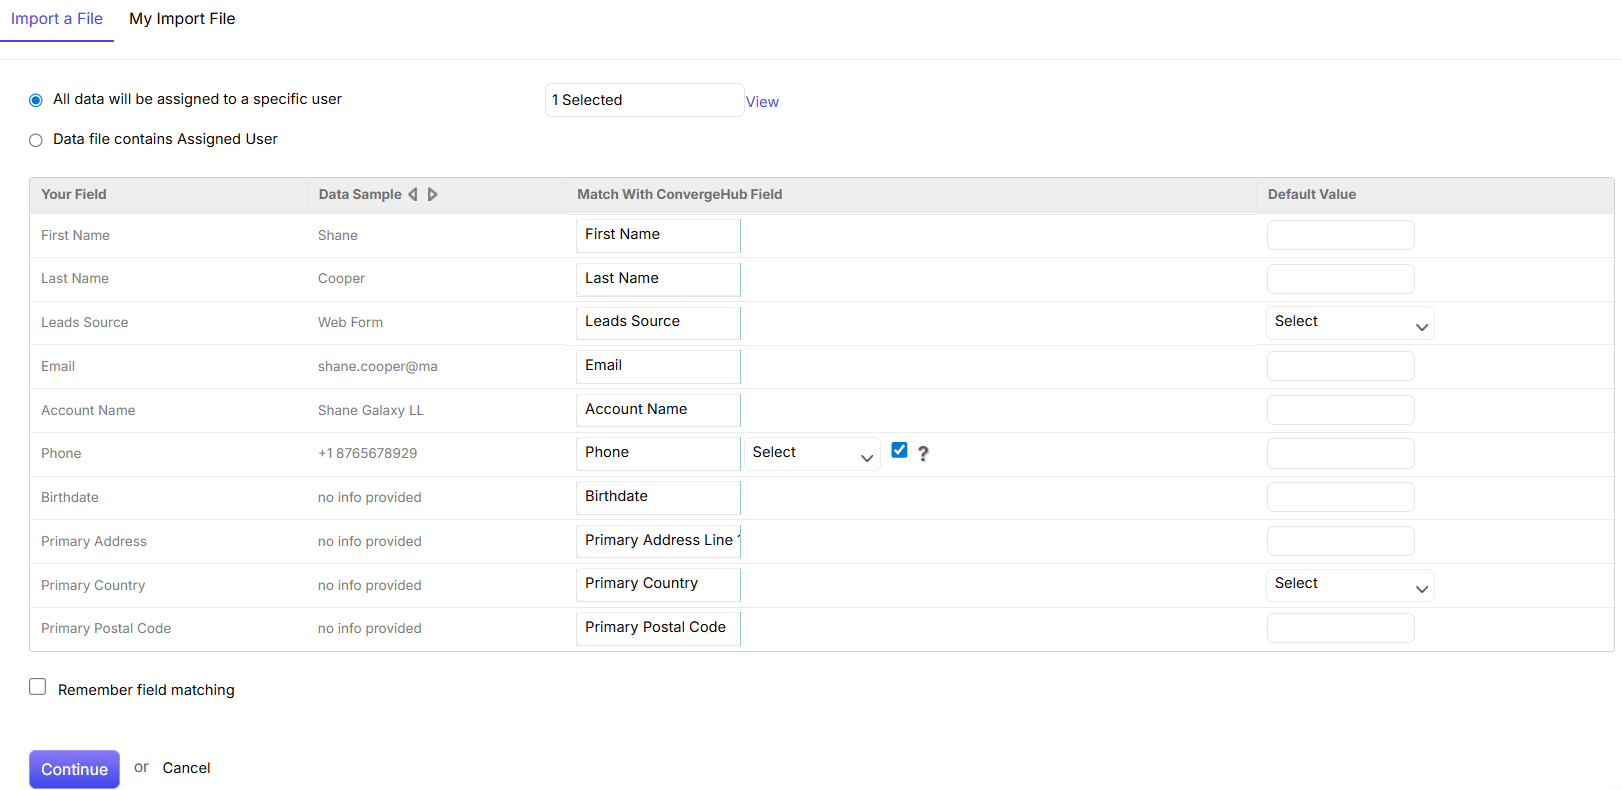
You can add New Task by filling in the fields set in the General tab and then clicking on the Save button.

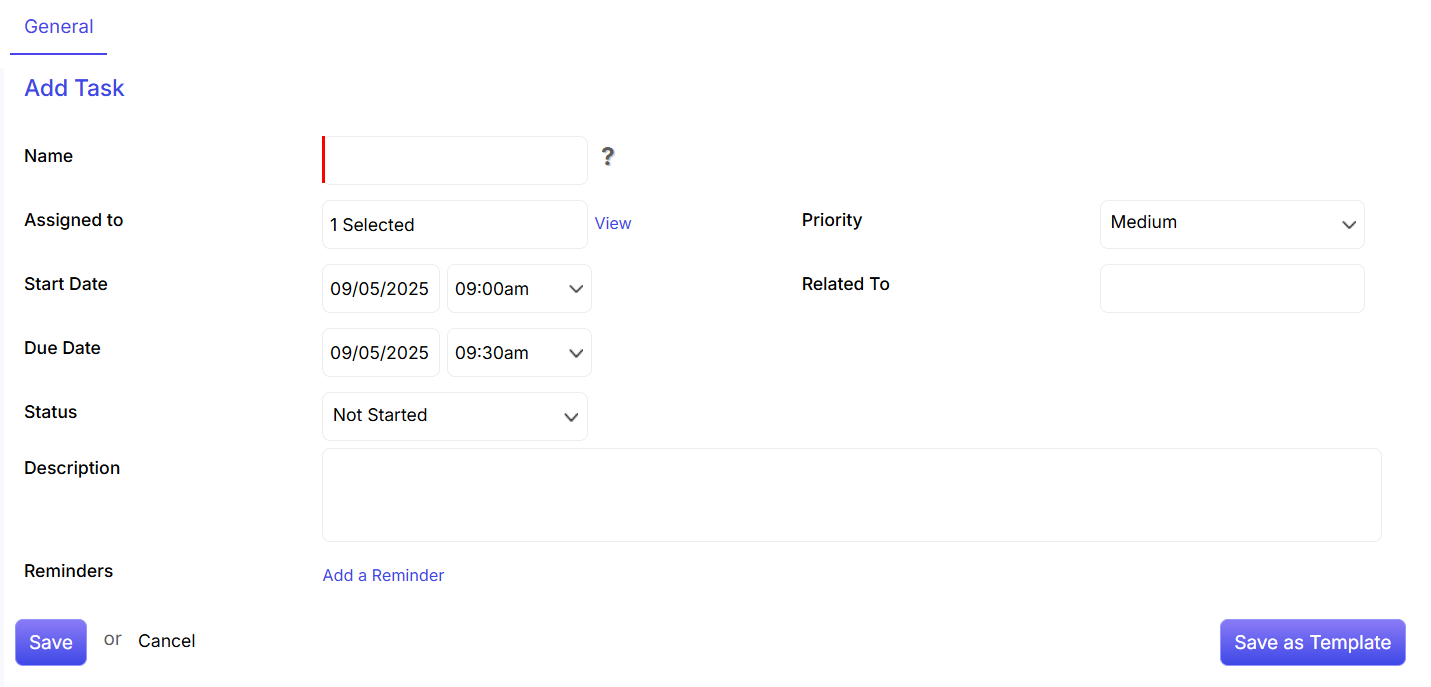
The Name field is mandatory.

Task is automatically Assigned To the person who has created it. To edit this, click on the text box and type, an auto-suggestion list of users will appear.

You can set the Start Date, Due Date, start time and due time of the task.

The Status of the task such as started, not started, cancelled can be edited.

You can change the importance level of the task as High, Medium or Low through through the Priority field.

On the Related To field, you can type or choose from the auto-suggestion list of ConvergeHub regarding Accounts, Contacts, Leads, Cases and Users to whom you want to relate this task.

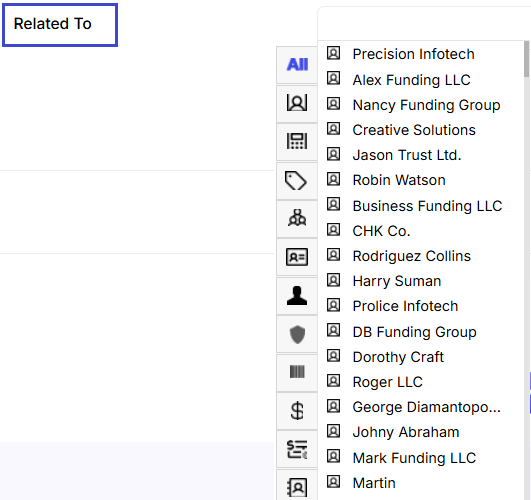
You can add the Description of the task.

You can set up a Reminder for the task.

Edit Project

Projects can be edited by clicking on the ConvergeHub 
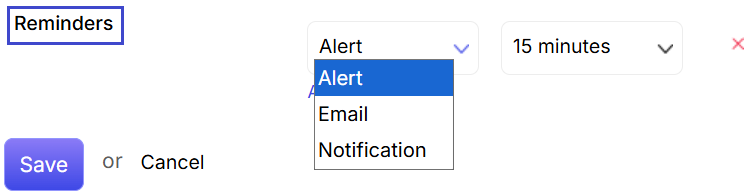
link in the Project details page. All the content which are added to a Project can be edited through the below-mentioned fields.
ConvergeHub

  • Edit the name of the project.
  • Increase or decrease the project progress percentage from here.
  • Change the starting date of the project. Choose a new date from the calendar.
  • ConvergeHub

  • The Contact automatically gets assigned to the person who has created it. To change this, click on the text box and type. An auto-suggestion list of users will appear from which you can select names by ticking the check boxes. One Contact can be assigned to multiple users.
  • Edit the unique project code.
  • If required, you can replace the existing account with some other from the CRM database.
  • You can also add more accounts to the project by clicking on ConvergeHub.
  • Give a new deadline for the project. Choose the date from the calendar.
  • ConvergeHub

  • Change the status of the project from the drop down option.
  • Click on ConvergeHub to apply the changes in the project details section. Or else, click on.ConvergeHub

Add Project

New project can be added by clicking on ConvergeHub in the left panel or by clicking on ConvergeHub tab in the upper right corner of the project listing page.
ConvergeHub

  • Fill in the name of the project (This option is compulsory).
  • Fill in the progress% of the project.
  • Fill in the date from when the project will commence.
  • ConvergeHub

  • The Contact automatically gets assigned to the person who has created it. To change this, click on the text box and type. An auto-suggestion list of users will appear from which you can select names by ticking the check boxes. One Contact can be assigned to multiple users.
  • Enter the unique code of the project.
  • Enter the account name in relation to the project.
  • You can add multiple accounts to the project by clicking on ConvergeHub when you click on this option, a pop up appears from where you can add the other accounts.
  • ConvergeHub

  • Put in the project deadline from the calendar.
  • ConvergeHub

  • Set the present status of the project from the drop down option.
  • ConvergeHub

  • Click on ConvergeHub to add the new project to the project listing page. Or else, click on cancel.

Project

Project is a newly added feature into ConvergeHub. It enables the users to effectively execute, manage and monitor their organization-wide projects from the CRM itself. A set of Actions related to the Project can be set such as – Milestone, Task, Sub task, Time-sheet, Billing and Deadline. Further you can also assign the tasks and sub tasks of the project to your team members.

You can learn about Project from the following:

Tasks

Task is the list of activities which are assigned, scheduled and executed by users to achieve goals related to Sales. In this section, you will be able to learn how you can manage Tasks.

Please go through the following :

Manage Duplicates

ConvergeHub users can merge records together as per their business requirement. This option is available for the following modules – Leads, Contacts, Accounts and Target. Below are the steps that illustrate how users can merge the records:

Select the module, whose records you want to merge.

Once you select the module, you get the different criteria based on which you can filter the records.

Once you have selected the criteria, click on Search.

Select the check boxes beside the records that you want to merge together.

Click on proceed at the end of the record list.

It shows the fields that will appear in the merged record page.

It shows the names/values that will appear in the merged records page.

It shows the records of the first lead

It shows the records of the second lead.

It shows the records of the third lead.

As per your requirements, you need to select the check boxes from record 1, record 2, and record 3. The selected records in total will show in the Merged Record (new) section.

Collaboration (Library)

Collaboration module allows you to invite third party associates to view and update the files and folders. Different from sharing, here you can invite your key business associates who may or may not be ConvergeHub users. When you send an invitation, the invitee will automatically receive an e-mail. If the invitee is an existing ConvergeHub user, he/she can log into ConvergeHub and can view the file or folder under the Library section.

If the invitee is not a user of ConvergeHub, he/she needs to register in ConvergeHub to view the file or folder. (The registration is free.) Post the registration done, the invitee can access ConvergeHub with a similar user interface but with limited features.

1. How to collaborate files and folders?

  • You can view the number of collaborators existing for the respective file/folder. In the above-mentioned example, there is no collaborator added to the file so the number is 0. When you add collaborators, the number will automatically get increased.
  • You can invite collaborators to the file by clicking on Invite Collaborators or Advanced Options.

2. Inviting collaborators
When you click on Invite Collaborators or Advanced Options a new section pops up with the necessary fields to be filled in.
A. Email Invite

  • Send To: You are required to type in the email id of the invitee. If the invitee is an existing user of ConvergeHub, then you can select from the options that automatically appear when you start typing in.
  • Message: You are required to type in the message here.
  • Expiry Date: You can set the expiry date of the collaboration period from the drop down calendar.
  • Access Level: When you invite a third party associate to collaborate, you can set the access level from the drop down menu. Each access level has certain liberty and restrictions. For instance, if you choose the option editor, then the invitee can upload, download, preview, edit, delete and get link of the file. You are required to choose the option of access level depending how you want the invitee to view or use the file.

B. Share Invitation Link

  • Enable Invitation Link: Check the box to create a unique link. You can then copy and paste this link into an email to invite collaborators.
  • Access Level: Set the access level for the content you’re sharing through the custom link.
    Note: Each access level has specific permissions and restrictions. For example, if you choose Editor, the invitee can use the link to upload, download, preview, edit, or delete the file. Set the access level based on how you want the invitee to interact with the file.
  • Learn Access Type: To see a full breakdown of what each access level allows, hover your cursor over this icon.

Import File

The Import File option allows you to directly import all your Contacts/Leads (in CSV file format) to the CRM. This option is integrated in the CRM to eliminate manual feeding of data which is tedious and time-consuming.

Please note: While there’s no limit on the total amount of data you can import into ConvergeHub, each individual data file is limited to a maximum of 5,000 records. To import larger datasets, you’ll need to split your file into smaller files, each containing no more than 5,000 records.

To start, go to Tools from the menu on the left and click on Import.

    • Import To: Select the module you want to import data into: Accounts, Contacts, Deals, or Leads.
    • CSV: Browse for the CSV file you want to import. Make sure your file is in a CSV format.
    • Add To List: Check the box to add the imported data to an existing list. You can also create a new list by clicking the +Add New option.
    • My File Has a Header: If your CSV file has a header row, check this box. This helps the CRM correctly map your data.
    • Check for Duplicates: Use ConvergeHub’s smart duplicate checking functionality to find duplicate entries. When you select this option, you can choose which fields to check against, such as Name, Phone, or Email. You’ll also need to decide whether the system should ignore duplicate entries or update them with the new information.
    • Click on Import a File to import the list. Click on Cancel to stop importing the data.
    • Assign Data to a Specific User: Choose the user to whom you want to assign the imported records.
    • Match With ConvergeHub Field: Select the ConvergeHub field where you want the imported data to be merged.
    • Remember Field Matching: Check this box if you want the system to remember these field settings for future imports.
    • Click Continue to proceed with the file import, or click Cancel to stop.

    You will see the result of the duplicate checking done by ConvergeHub system. Based on the result, you can either ignore the errors and Continue or Cancel the file import process altogether.

    Referral

    All business leads, contacts and documents referred to external party clients  (who may or may not be ConvergeHub users) can be viewed in the listing page.

    convergehub

    • You can perform a quick search by inputting keywords on the Search field.
    • You can change the order of the library listing by clicking on the drop down option.
      convergehub
    • The various combinations of advanced search functions can be saved and edited with keywords of your desire and can be used to search repetitively. The keywords or phrase you have saved are available on the Saved Searches drop down.
    • You can mass select the referrals by clicking on the check boxes.
    • Referrals can be added to your favorites by clicking on convergehub.
    • They can be followed by clicking on convergehub. By doing so, you will be able to receive all the updates in the feeds.
    • You can get the options of viewing followers of a referral by hovering the cursor on it.
    • Clicking on the drop down, you have the option of viewing all referrals or only those saved by you.
      convergehub
    • You have two types of views for the Referral listing page i.e. column view convergehub and row view convergehub. You can select the view depending on your requirement.
    • The display of various Referral fields can be customized by making mouse hover on convergehub and then selecting the required fields you want to display.
      convergehub
    • The Referral listing is paginated and you can set the number of referrals you want to display per page. convergehub

    Partner