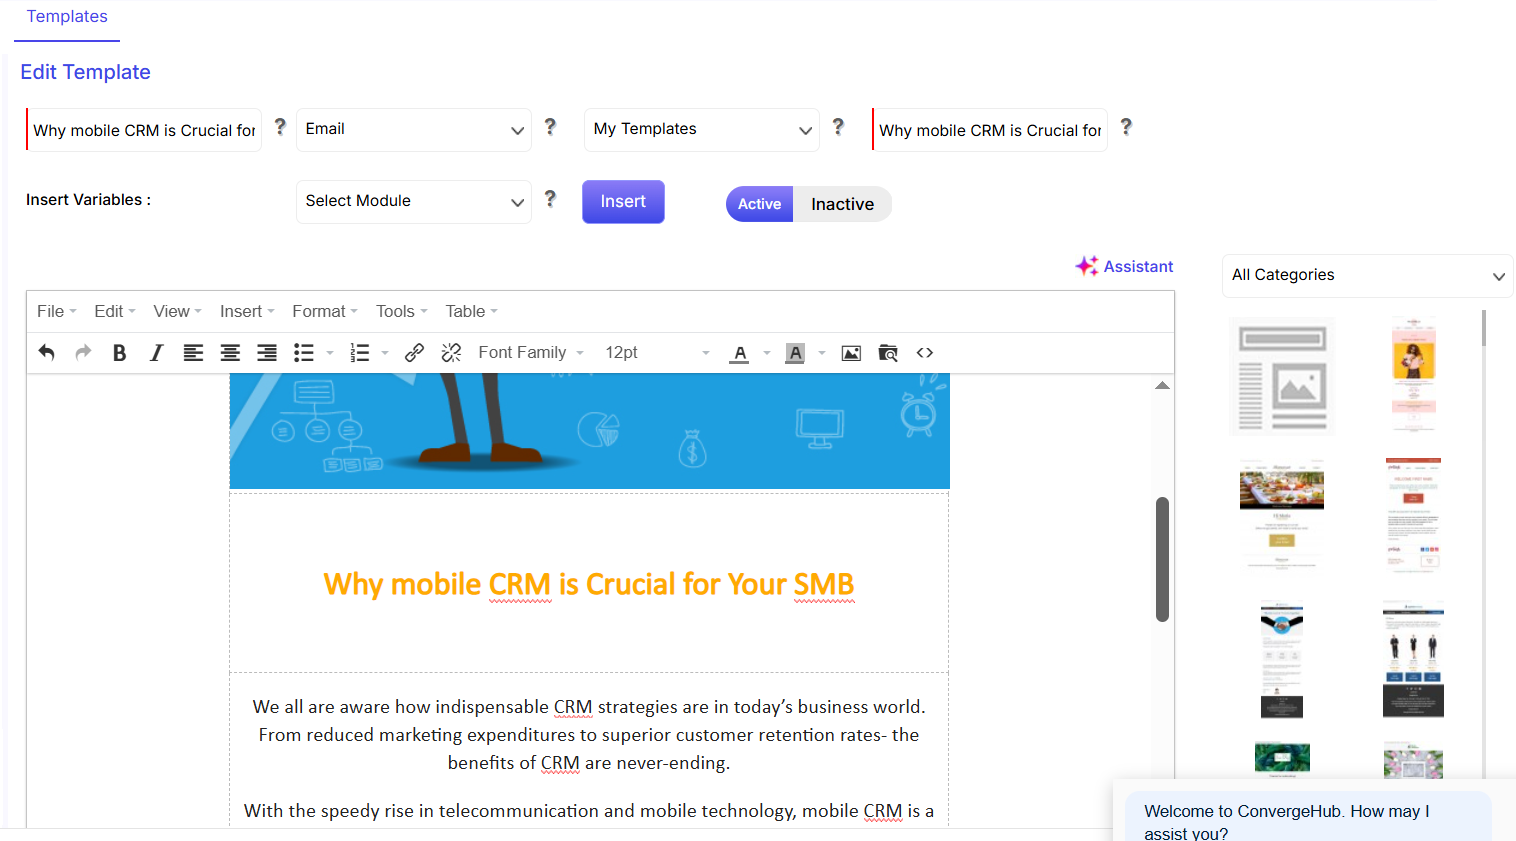
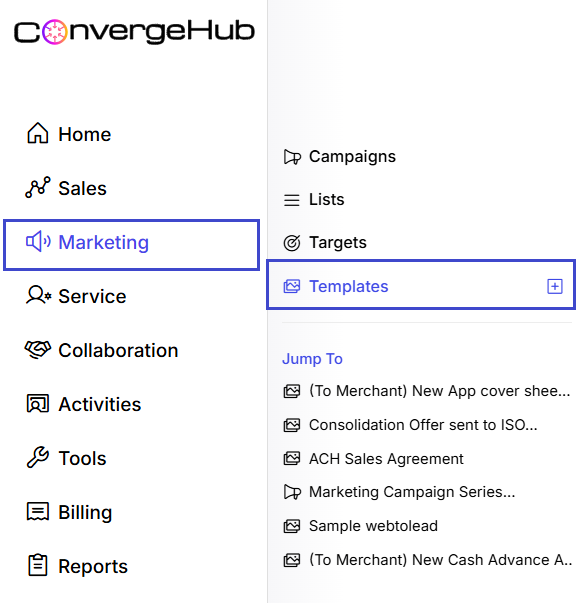
ConvergeHub admin users can create custom fields for different modules, such as – Accounts, Leads, Contacts, Deals and Cases etc. To start, go to Settings in the bottom left corner. From there, navigate to App Setup and select Custom Fields. You can then create a new custom field by clicking the  button in the top-right corner.
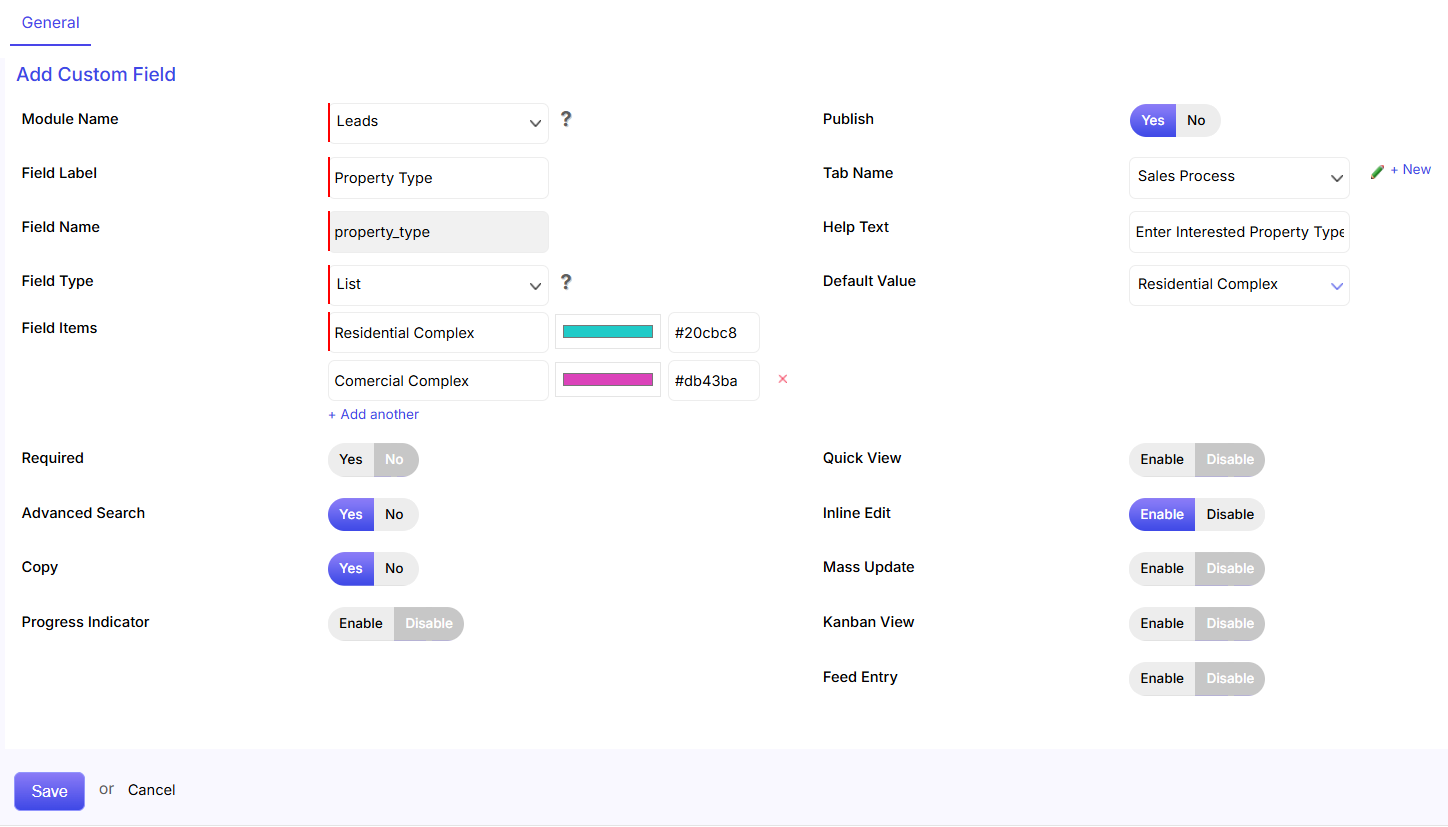
- Module Name: Select the module name for which you want to create the custom field. A drop-down menu will appear for you to choose from.
- Field Label: Enter the name you want to appear in the user interface into the field label field.
- Field Name: Set the field name.
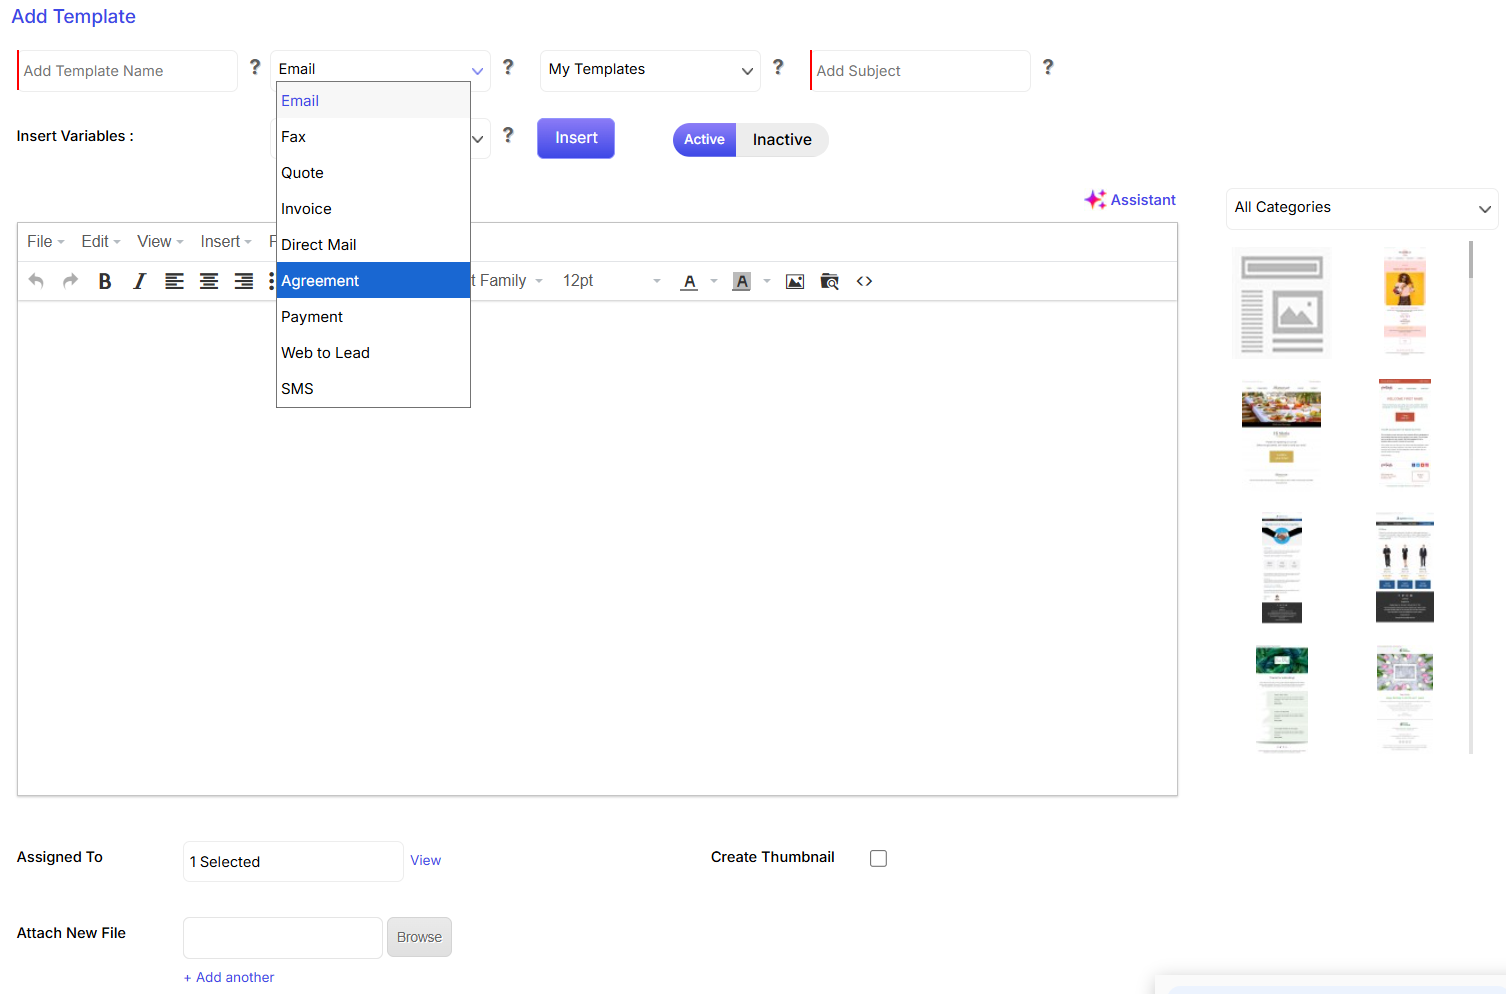
- Field Type: Select the field type like – Radio, Check Box, List, Text field, Text area, and Date field.
- Field Items: Enter the field items names for the following options: Radio, Check Box, List, and Boolean.
- Publish: Choose whether you want to publish the custom field or not.
- Tab Name: Select the tab name where the field will appear.
- Help Text: Add help text to the custom field to provide a better explanation for users.
- Default Value: Set a default value for field items.
- Required: Choose whether you want the custom field to be set as mandatory or not.
- Advanced Search: Choose whether you want the custom field to have advanced search or not.
- Copy: You can choose whether you want the custom field to be applicable under the copy functionality or not.
- Progress Indicator: The progress indicator is a visual tool that tracks your sales pipeline and shows the status of each field item.
- Quick View: Enable to view the custom field in the quick view pop-up or disable it.
- Inline Edit: You can choose whether you want the custom field to have inline edit option or not.
- Mass Update: Choose whether you want the custom field to have mass update option or not.
- Kanban View: Enable for ‘Kanban View’ for viewing Custom Field in action drop down of Kanban View.
- Feed Entry: Show/Enable custom field in feed entry section.
- Save: Click on the save button to create the custom field. The newly created custom field will appear under the selected tab of the respective module.Custom Fields Listing Page: You will find information about Prospect Mapping, Lead Mapping, and Organize.
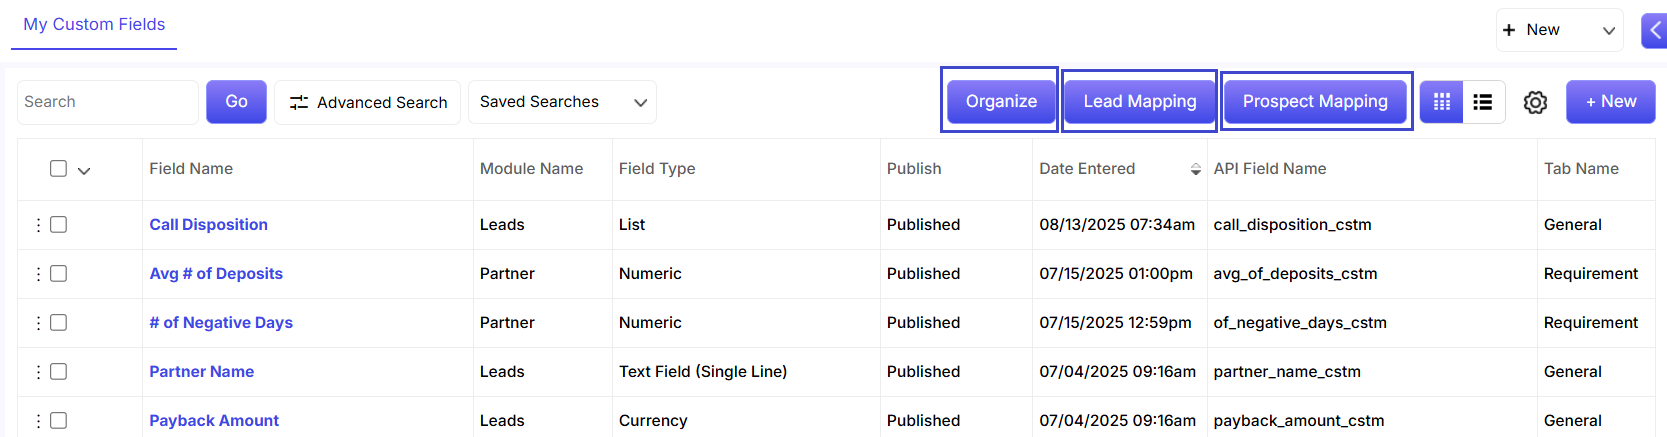 Prospect Mapping: Use the Prospect Mapping option to transfer prospect details and convert them into leads. After clicking, you’ll be taken to the Prospect Custom Field Mapping page.
In the screenshot below, select the lead custom field where you want the prospect’s data to be added. 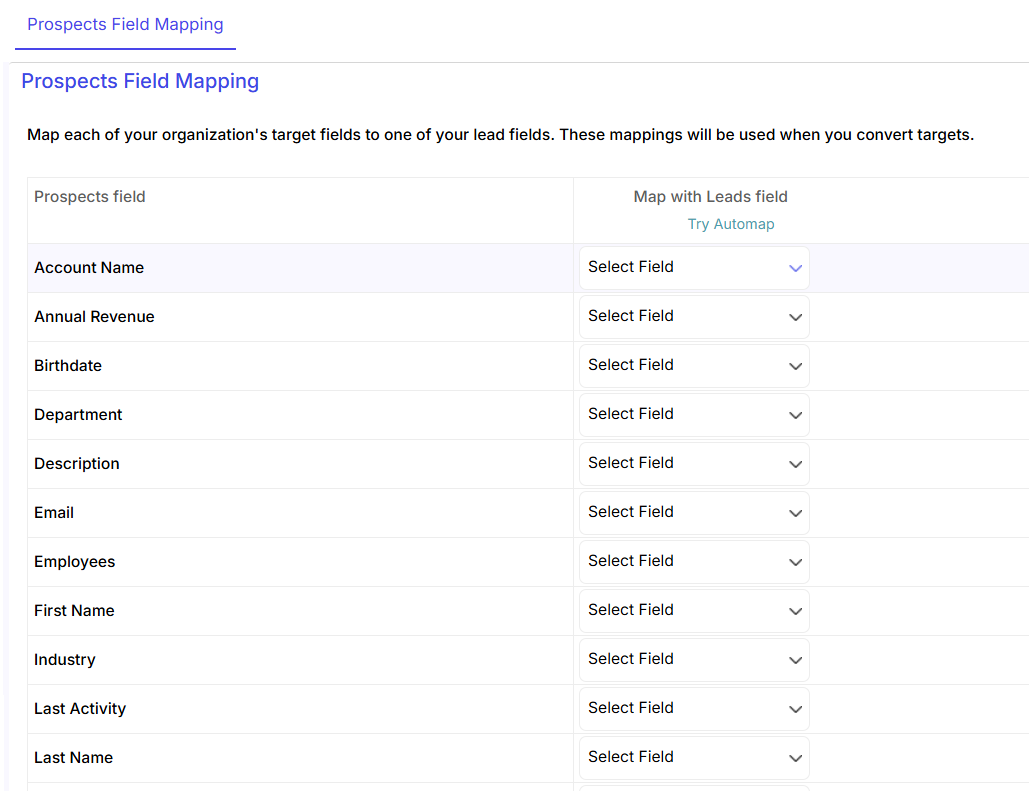
Lead Mapping: You can transfer the lead details into accounts, contacts and deals through the lead mapping option.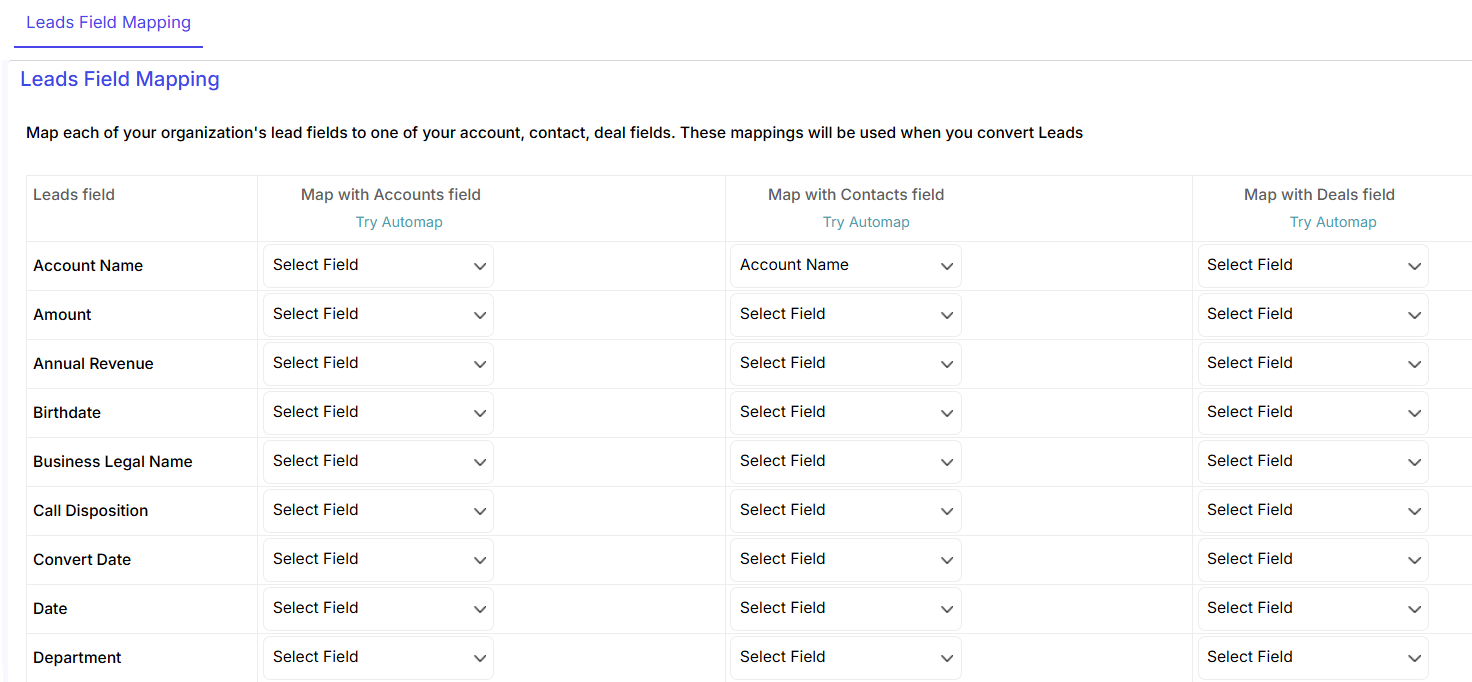
Organize: To change the position of your custom fields, first click Organize. Then, simply choose your module and tab to view the existing fields, which you can then drag and drop the fields into the desired position.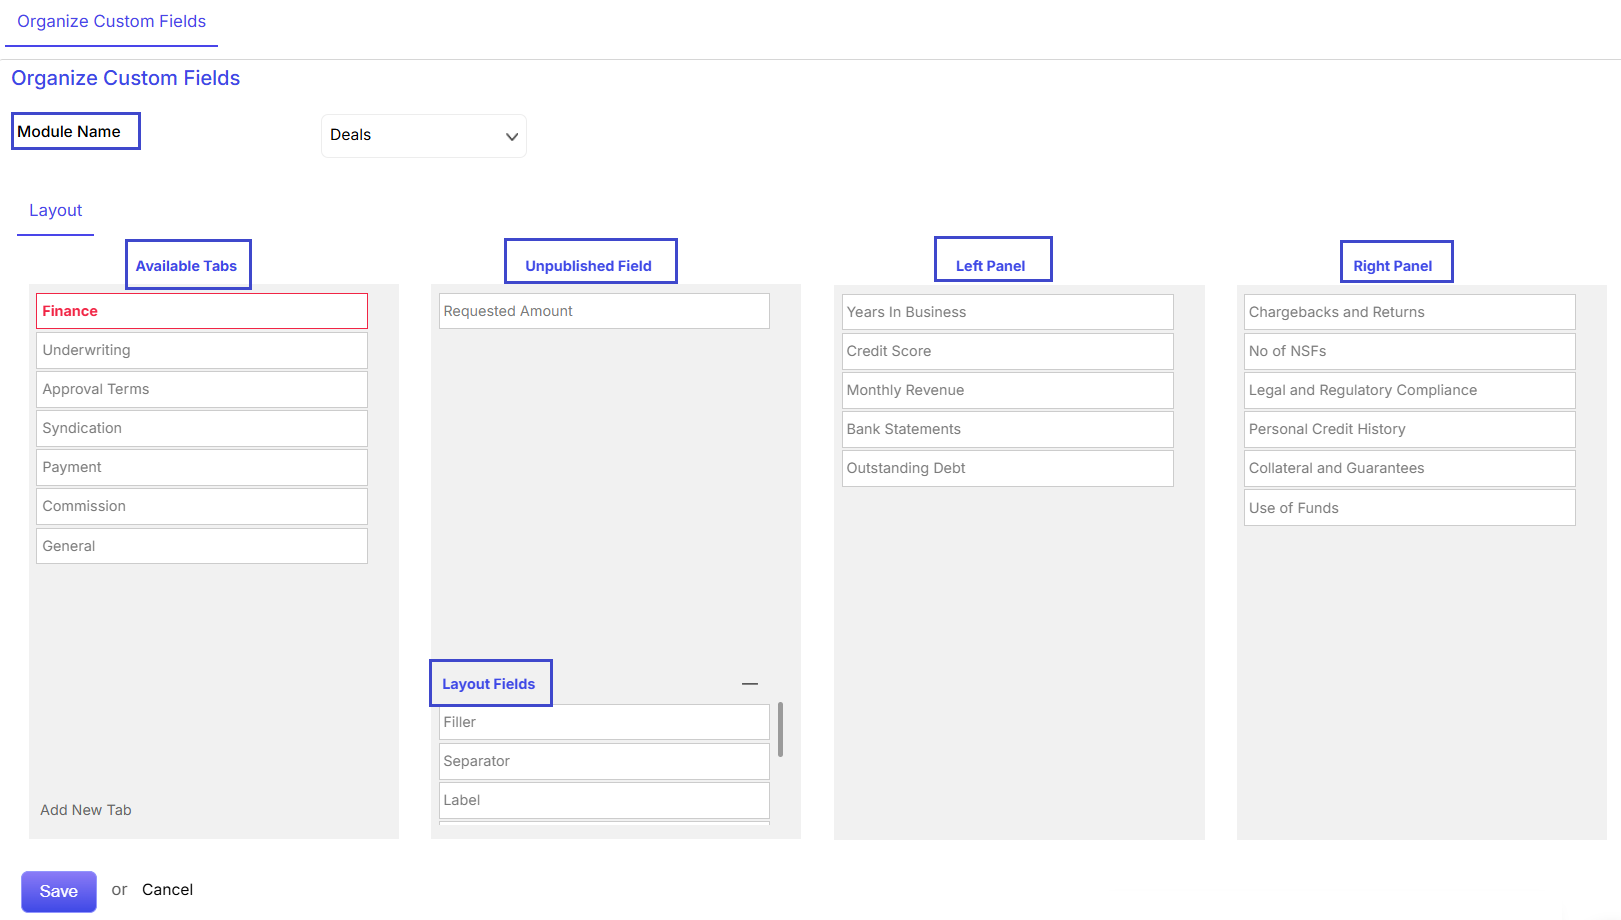
The Layout Editor in ConvergeHub is a tool for admins to customize the design of CRM pages for modules like Accounts, Contacts, Leads, and more. It helps you change the look and feel using three main elements: Labels, Fillers, and Separators.
Labels: Drag to add a heading, then click Label Settings to name it, and adjust the font size, style, and color. You can copy the color code for consistent styling.
Fillers: Drag these to add proper spacing on the page.
Separators: Drag these to categorize your custom fields.


 button at the top or clicking on
  that appears on hovering the mouse on the present data.
 will bring back the data set by default in Converge CRM.


 , a pop up window will appear from where you can make the call to the respective contact.