To start, go to Tools from the menu on the left and click on Workflows. Once you’re on the workflow list, you can create a new one by clicking the ![]() button in the top-right corner.
button in the top-right corner.
An ‘Add Workflow’ page will open up, containing the necessary fields to be filled in.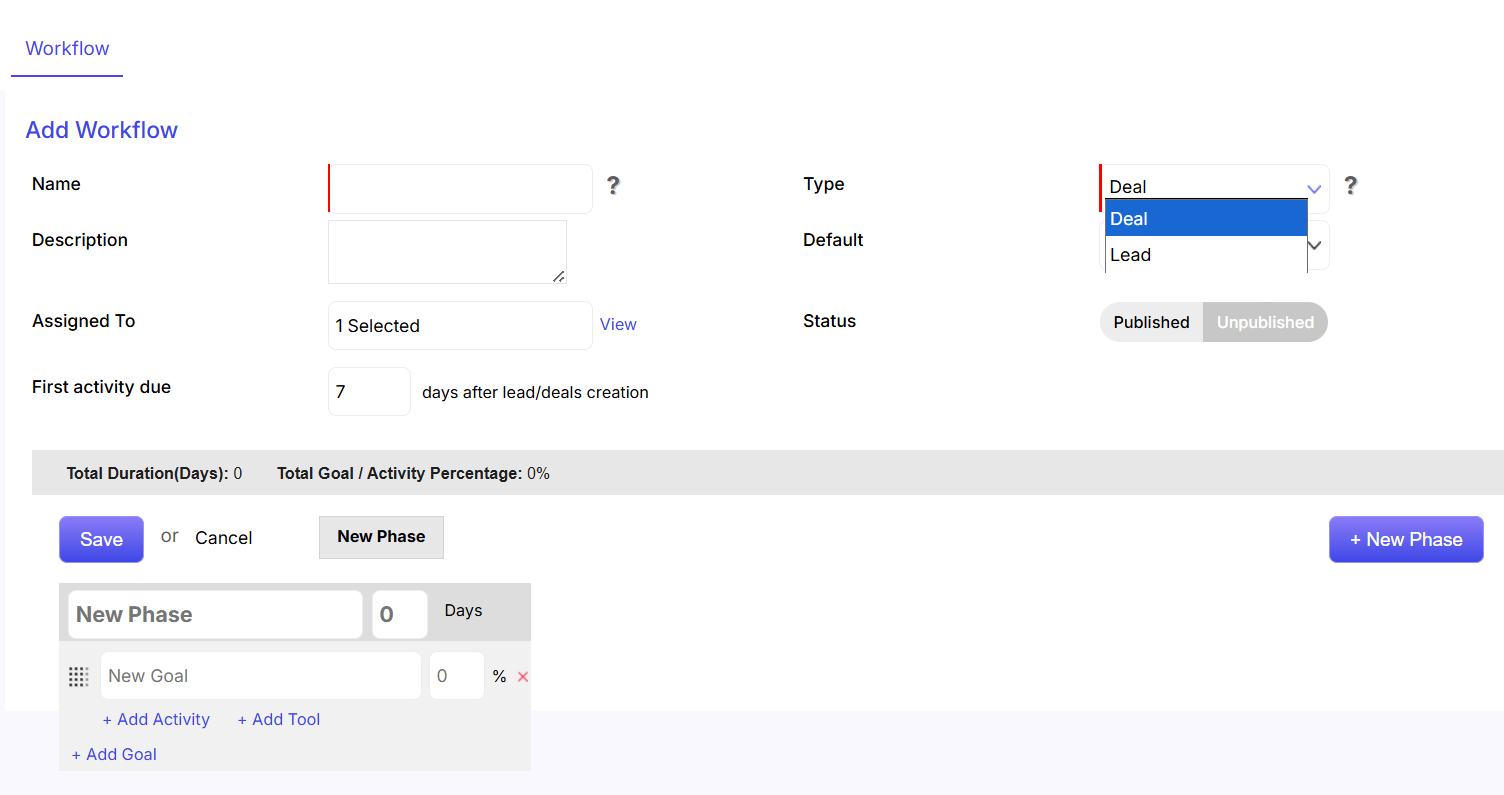
- The Name section is mandatory to fill.
- Description of the sales process can be filled in here.
- You are required to select the sales agent to whom the sales process will be Assigned To.
- You can set the number of days after which the First activity of the sales process will start.
- The Type section (i.e. for whom the sales process is applicable) is mandatory to fill. You can click on the drop down to choose your options between Deal and Lead.
- You can set the sales process as the Default (either Yes or No). Please note that once you set a sales process as default, every new lead or deal will have that sales process automatically set in.
- You can choose the status of the sales process as Published/Unpublished. Published will set the sales process as active while unpublished will make it inactive.
- Once you have inserted all the necessary details, click on the Save button to save the sales process. Or else, click on Cancel.
- You are required to type in the name of the Phase here.
- You are required to type in the Goal name here. In addition to the goal name, you need to set the percentage of the goal too. Please remember that if you want to create other goals under different phases, then you need to set the percentage of each goal carefully. In total, the percentage of all goals should come to 100%.
- You can put sub-activities and tools under a single goal.
- You can set the number of days in which you want the phase to get completed.
- Click on +New Phase to add another phase to the sales process.

 option.
 option.
 or row
  view. New Invoice can be added to the Invoice Listing page either by clicking on
  link in the left column or by clicking on
  tab in the upper right corner of the invoice listing page.


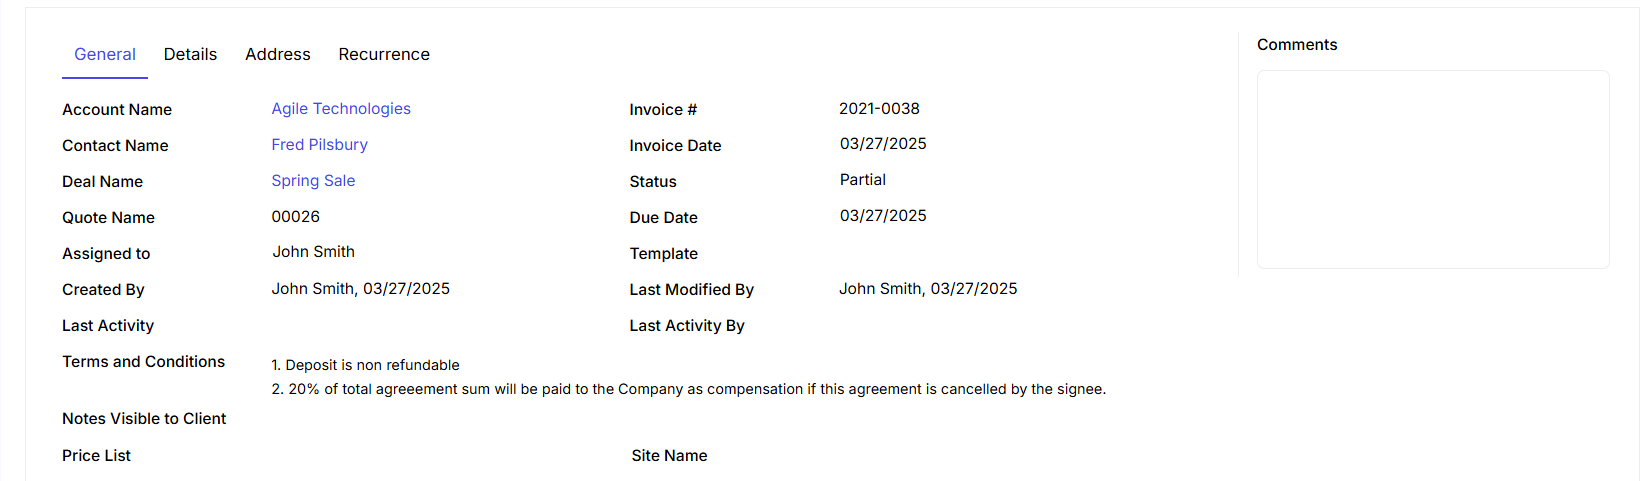
 icon. You will be able to receive all the status changes and updates regarding the Invoice in the feeds.
 icon.
icon. icon.
icon.  icon.
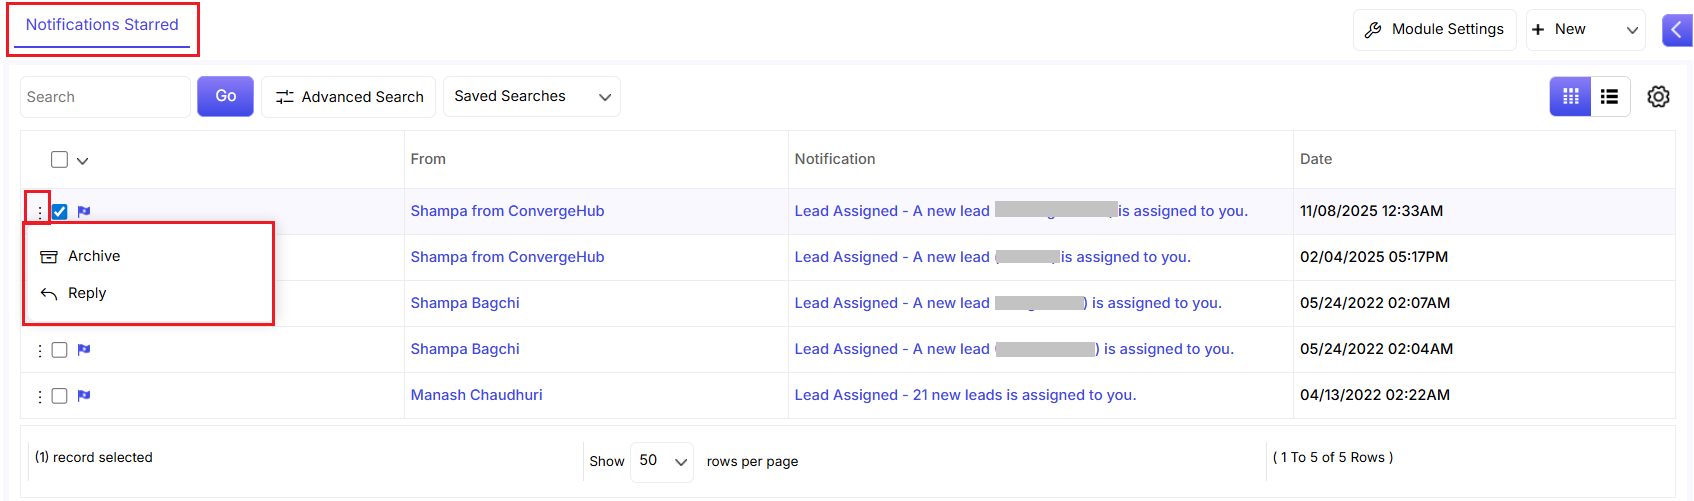
icon. and then selecting the required fields that you want to display.
 or delete
 .
. . Once done, you will be able to receive all the task updates in the feeds section.
 .
. .
.