It is of little surprise that there is a gradual shift happening in terms of the consumer’s attitude to the value of the data they are willing to share with brands and businesses. Since, as the digital economy is growing and expanding consumers and people, in general, are becoming less sensitive about sharing their data with businesses.
This is because, many consumers have learnt by now that sharing their data can make them benefit through offers and rewards and so brands should feel themselves presently empowered to request data from their customers, or use information by a prospect’s interaction with a brand’s website, to inform their marketing teams if the persons in their email campaign’s list have actively opted-in to their marketing efforts.
It is of little surprise that there is a gradual shift happening in terms of the consumer’s attitude to the value of the data they are willing to share with brands and businesses. Since, as the digital economy is growing and expanding consumers and people, in general, are becoming less sensitive about sharing their data with businesses.
This is because, many consumers have learnt by now that sharing their data can make them benefit through offers and rewards and so brands using easy to use CRM solutions should feel themselves presently empowered to request data from their customers, or use information by a prospect’s interaction with a brand’s website, to inform their marketing teams if the persons in their email campaign’s list have actively opted-in to their marketing efforts.
Hence for brands that are willing to stay ahead of the pack, here are some of the top tips that will help businesses to build strong relationships with their customer base, and implement effective methods for building motivations among their customers which even help create brand loyalty in the long haul.

Be clear about how personal data will be used
Extracting valuable information and insights by requesting the customer to understand their likes and pain points and thereafter define their requirements is most important when it comes to boosting their relationship with your brand.
However, the framing, and context of this request are vital, as it provides clarity on how this information most often stored in the easy to use CRM database will be used if you are a user of an easy to use CRM system.
In a recent survey conducted by ConvergeHub CRM for small business, it has been found that while many consumers are willing to share their personal info with a brand or company they trust, there are also others that proclaim that they are ready to do it, if they are aware that parting with their information would make them receive rewards or discounts in exchange of their data.
Therefore, ensuring your customers and making them learn why you are requesting their personal data, and what they can expect in return, is incredibly necessary for building trust and credibility of your brand.
Use data in a timely manner, and use it effectively at regular touch-points
You must take adequate care to avoid dropouts during the registration process with your brand, and also make sure that any information shared is effectively and swiftly deployed into a nurturing process. Hence, once the information about the leads and customers are collected in your easy to use CRM database, it must be acted upon quickly to decrease the risk of losing that customer forever.
According to a survey it has been found that 84% of participants said that they would not register with a business if they are not subsequently contacted more than twice, which amply implies how necessary it is for the information to be used instantaneously and thereafter at regular intervals.
This is because, like with any other relationships, the primary stages are extremely critical for building a long-lasting impression on your leads and customers.
Hence after a new customer or lead signs up for your newsletter send a tailored offer in an email to the customer or send a helpful post-purchase email containing further information about your offerings that will aid in creating engagements at every touch-point and reflect the present context of that relationship by anticipating the customer’s needs.
Follow and match your customers’ communication preferences
While well-established channels for marketing like email are still adding value for the brands but presently according to studies even less than 10 percent of customers feel that their favorite brands are ‘excellent’ at anticipating and understanding their customer’s needs.
Therefore, modern marketers must gain and manage insights from all touch points at all times.
Businesses are also required to bring in continual refinement to their marketing and support strategies so that they can reflect and understand how their customers are adopting new behaviors.
This is because; influential contact points and emerging channels such as SMS, and social media are becoming more important nowadays which is especially true for the younger audiences in today’s B2C and B2B marketplace.
Therefore, to be able to identify how to effectively engage a customer across this mix, and understand the complications of today’s data-driven customers is the key to creating relevance nowadays.
Hence it is only be orchestrating channel preferences you can improve the customer experience of your brand by building upon each contact points, which is capable of generating seamless interactions that lay the foundation of an effective and impactful nurturing program through deeper customer interactions, a process which can be aided by using an easy to use CRM software platform.
Reward and measure
Discounts and vouchers are one of the leading triggers to purchase for all cash-conscious customers.
According to a survey some 74% of the surveyors that used vouchers while shopping, proactively engaged to access them in several ways.
Therefore, after looking at this redemption behavior, ensure that you must continue to optimize the impact of offering rewards and offers, whilst creating a parallel control group in your organization that must provide a true test of the purchase’s uplift value that your email campaigns have driven.
However, while providing offers and discounts you must also remain sure that you are not just encouraging promiscuous buyers who only shop with incentives and for that ensure that all your communication with the shoppers adds high potential value and relevance to their purchasing experience.
Keep on top of your data
Finally, according to a survey, it has also been found that more than 81% of the consumers welcome and like brands that make their decision to buy easier, by suggesting inspirations for future purchases based on their previous shopping- as long as these recommendations are accurate and appropriate.
However, the essential part in achieving this success lies in assimilating and updating your customer data and integrating it across your channel mix, by using technology systems like Salesforce or any other Salesforce Alternative CRM solutions that facilitates centralized and automated analysis across all touch points.
Conclusion
Therefore, balancing trust and data sensitivity through contextual and meaningful customer interactions is most needed to ensure that your prospects and customers will continue to view the benefits of data exchange, as nowadays “Average” experience in an age where customers can pick from a growing number of alternative options will not cut with the demanding shoppers that rule the modern marketplace.


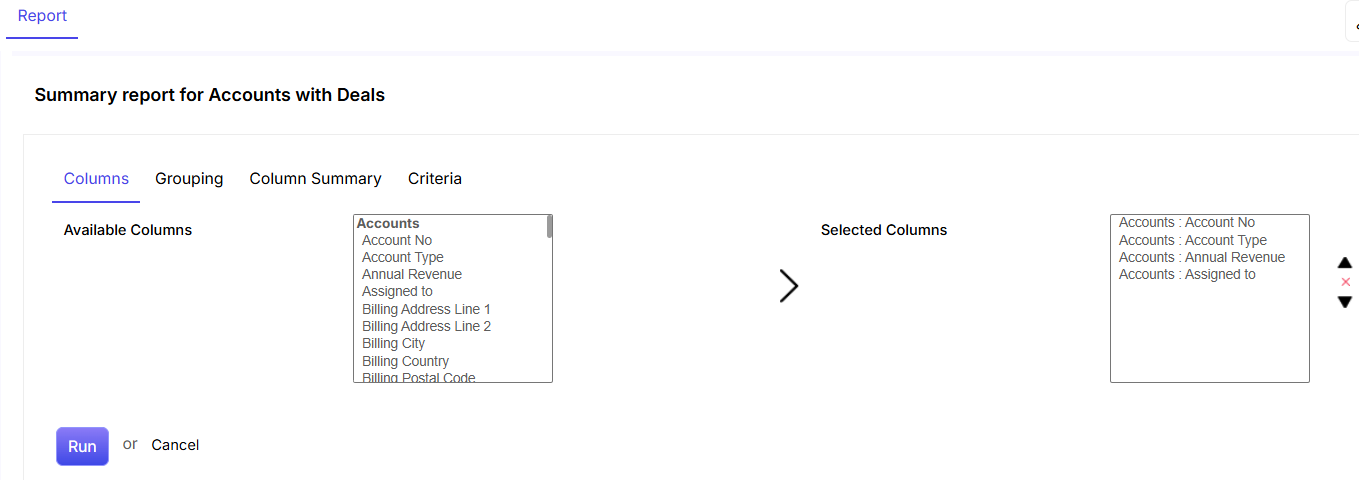
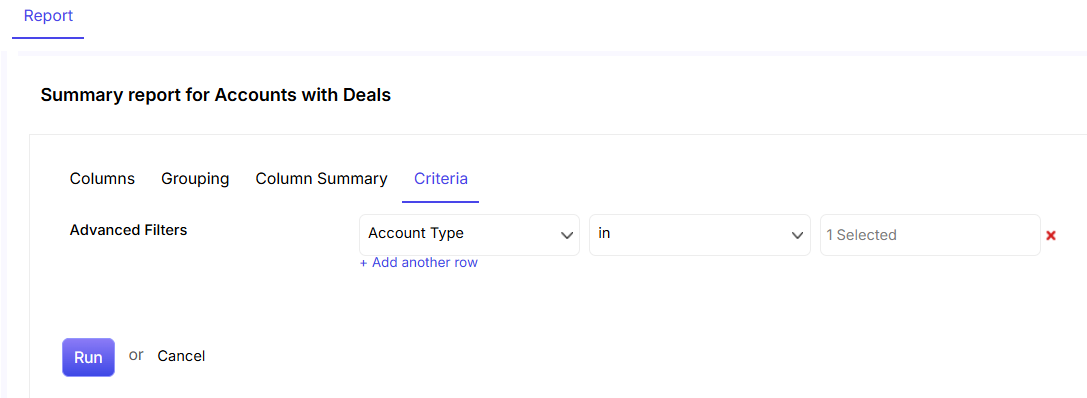
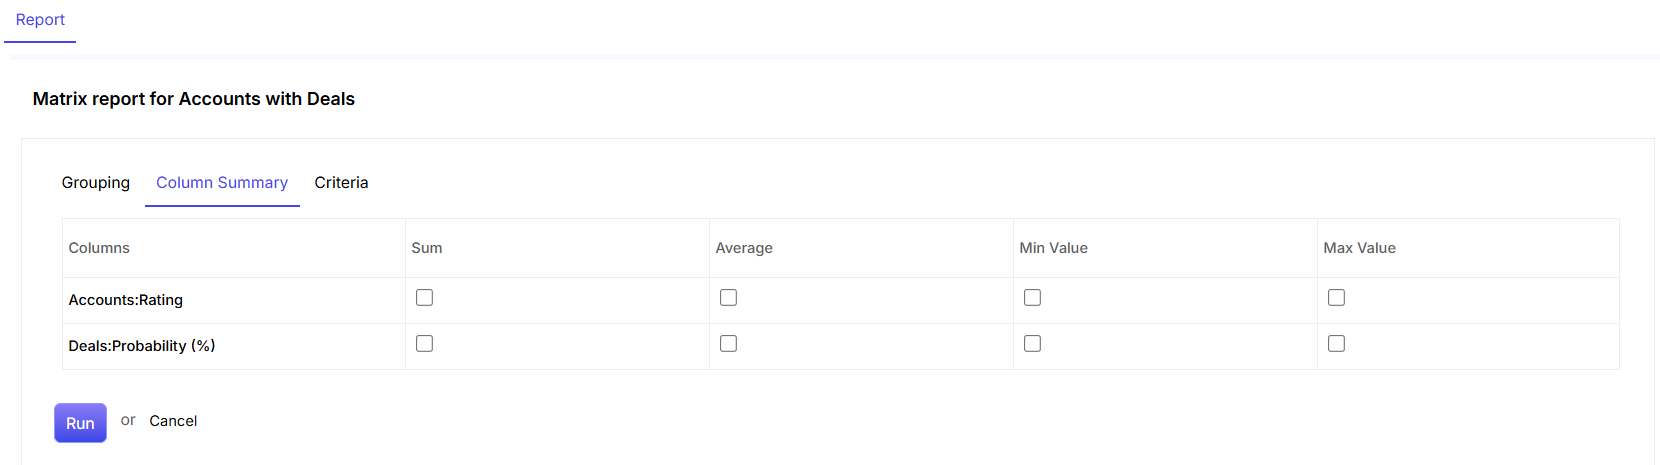
 icon. Once you select a Column, you can also scroll down by clicking on the


 .
. link.
link.
