Edit Report

Reports can be edited from the the report listing page by clicking on the inline edit option convergehub. Also report can be edited from the Report details page by clicking on the convergehub link.
convergehub

    • You can edit the Module, Report Format and Related Module from here. Clicking on the convergehub will take you to the next stages of report editing.

Columns
Through the Columns tab, you will be able to reset the different columns that you want to include in your report.
convergehub

    • Clicking on convergehub will take you to the next stage i.e. Order By.

Order By
Through the Order By tab, you can re-select the fields by which you want the report information to get organized. You can also change the order the report in Ascending or Descending format.
convergehub

    • Clicking on convergehub will take you to the next stage i.e. Criteria.

Criteria
Through the Criteria tab you can reset Advanced Filters. This can be done by re-selecting new required fields from the list and then setting conditions and putting values to corresponding conditions.
convergehub

    • Clicking on convergehub will take you to the last stage of report editing.

Here you can edit Report Name, Description and Advanced Filters. You can also change the scheduling of the report if you want.
convergehub

  • You can edit the name of the report here.
  • You can edit the report description.
  • You can edit Recipient Email address in the given field.
  • You can edit the status of the report as active or inactive by clicking on either of the convergehub options.
  • Once you have made the changes, click on convergehub to save the changed options.
  • Click on convergehub to generate the report.

Report

Report is significant to realize and analyze achievements and set backs. At a glance it will reflect your business growth based on your existing data fed to the system.

You can learn about Report from the following sections:

Web to Case Listing

All Web to Case forms created within ConvergeHub platform can be viewed in the listing page.
convergehub

    • You can perform a quick search of the Web to Case forms by inputting keywords in the Search field.convergehub
    • You can also search for the Web to Case forms by using various search criteria through the convergehub link.
    • The various combinations of advanced search functions can be saved and edited with keywords of your desire and can be used to search repetitively. The keywords or phrase you have saved are available in the Saved Searches drop down.
    • By selecting check boxes beside the Web to Cases, you can select all and then Mass Update them from the action drop-down.
    • Web to Case forms can be added to you favorites by clicking on. convergehub
    • Web to Case forms can be followed by clicking on convergehub. You will be able to receive all the Web to Case Forms status change and updates in the feeds.
    • By selecting check boxes beside the Web to Case forms, you can perform multiple actions on them from the Select drop-down.
    • The display of fields in the Web to Case forms listing can be customized by making mouse hover on convergehub and then selecting the required fields you want to display.
    • You can select check boxes beside Web to Cases, and then Mass Update them from the Action drop-down.
    • Web to Case forms can be added to the listing page by clicking on convergehub button on the upper right corner of the page.
    • You can choose the display pattern (column view or row view) of the Web to Case forms listing page by clicking on either of the options.convergehub

convergehub

  • You can perform multiple actions on Web to Case forms by hovering the cursor on them.
  • You can edit convergehub or delete convergehub a Web to Case form by hovering the cursor on it.
  • You can delete a Web to Case form by clicking on convergehub.
  • You can set the number of rows to be displayed on the page by clicking on the convergehub show drop down.

New Cases

New case can be added by clicking on convergehub link in the left panel or clicking on convergehub button in the upper right corner of the cases listing page. You can add detailed description about the problem faced by your customer through the different fields and even attach a supporting file related to the case.
convergehub

  • The Subject field is mandatory. Put a name for your case or else, you will not be able to add it.
  • Select the customer related to the case.
  • Select the category of the case from the drop down menu.
  • Select the priority of the case from the drop down menu.
  • Put the name of the contact person in the Contact Name field.
  • Select the medium from where the case has been generated.
  • The Case automatically gets assigned to the person who creates it. To change this, click on the text box and type. An auto-suggestion list of users will appear from which you can select names by ticking the check boxes. One Case can be assigned to multiple users.
  • Add a description in relation to the case.
  • Attach files in support of the case.
  • Click on Save to create the Case or else click on Cancel.

Edit Web to Case

Web to Case forms can be edited by hovering the cursor on a Web to Case form in the listing page and clicking on the edit convergehub option.
convergehub

    • Change the Form Heading.
    • Modify the Layout of the Web to Case form. Choose and then drag and drop the fields in the two columns.
    • Click on Others to edit the remaining details of the form.

convergehub

    • Change the agent to whom you would like to assign all the cases that get generated from the form.
    • Edit the text that you would like to have on the form submit button.
    • Edit the description to the form.
    • Edit the text that you would like the customer to get post the successful completion and submission of the form.
    • Give in another URL of the landing page where the customer will go to after the successful completion and submission of the form.
    • Click on Next to proceed further or else click on Cancel to stop form creation process.
    • Get a Preview to the form created.

convergehub

    • Further customize the form by making changes in the Source code.

convergehub

    • Click on Edit section to make more changes in the text of the form.

convergehub

    • Click on Direct Link to copy paste the code into the website back-end.

convergehub

  • Click on Download option to open the form HTML page. Or else, click on Back to recede. convergehub

Edit Cases

Case details can be edited by clicking on the convergehub edit link in the case details page or by clicking on convergehub in the case listing page.
convergehub

  • Edit the subject of the case.
  • Choose the account name from the drop down list.
  • Change the Case Category by clicking on the drop down that includes three options – Problem, Feature Request and Question.
  • Change the Case Priority by clicking on the drop down that includes three options – High, Medium and Low.
  • Change the Case Status by clicking on the drop down that includes five options – New, In-progress, Re-opened, Resolved and Feedback required.
  • Set the new contact name of the case.
  • Change the Case Origin by clicking on the drop down that includes three options – Email, Phone and Web.
  • Select the new support agent from the drop down list.
  • Once the changes are made, click on convergehub to update the new information.

Cases Listing

All Cases can be viewed in the listing page. The left panel of the Cases Listing page includes the following options:
convergehub

    • Cases can be added to the listing page by clicking on convergehub link.
    • You can add bulk Cases through a CSV file from the convergehub link.
    • You can create Cases reports using convergehub link.
    • All web to cases can be viewed by clicking on convergehub link.
    • New web form script can be generated from the convergehub link.
    • You can set the mail to case settings by clicking on convergehub link.

convergehub

  • You can perform a quick search of the cases by inputting keywords in the Search field.convergehub
  • You can also search your Cases by using various search criteria through the Advanced Search link.convergehub
  • The various combinations of advanced search functions can be saved and edited with keywords of your desire and can be used to search repetitively. The keywords or phrase you have saved are available on the Saved Searches drop down.convergehub
  • You can select check boxes beside the Cases and Mass Update them from the action drop down.convergehub
  • New Case can be added from the listing page by clicking on convergehub button.
  • You can change the list view for Cases by selecting either column view convergehub or row view convergehub.
  • By selecting check boxes beside the Cases, you can select them together and Mass Update them from the action drop down.
  • The Cases can be added to you favorites by clicking on convergehub.
  • By clicking on convergehub. you can follow the cases to receive all their updates as feeds.
  • You can export any case to CSV convergehub or PDF convergehub format. You can also delete a case by clicking on convergehub.
  • The Cases listing is paginated and you can set the number of cases you want to display per page.
  • You can add task, event, note, comment, attach documents or view the list of followers of any case by hovering the cursor on it.
  • From the select drop down you can Create Task, Add Comments, Schedule Event, Attach Files and Copy Cases.
  • The display of various Case fields can be customized by making cursor hover on convergehub and then selecting the required fields you want to display.

Case Details

All information pertaining to a case can be viewed from the case details page.
convergehub

  • The case can be added to your favorites by clicking on convergehub.
  • The case can be followed by clicking on convergehub. By doing so, you will be able to receive all the case updates in the feeds.
  • You can edit the case details by clicking on the convergehub link.
  • You can directly move to the previous or next customer case by clicking on the respective icons.
  • You can navigate away to the previous page by clicking on convergehub.
  • You can add notes, documents, products, events and tasks related to the case by clicking on convergehub
  • You can select the Action drop down menu to Copy or Edit the respective case.
  • Case can be closed immediately by clicking on this button.
  • General tab displays information such as – case number, status, subject, account name, contact name, category, priority, case origin and assigned to support agent name. Please note that all these details get automatically filled in whenever customers submit the complaint through the email id provided in the Mail to Case settings.
  • The support agent can reply to the case by adding the comments in the dialogue box.
  • If required, the support agent can attach a file to the answer.
  • The agent can click on Submit to send the message and the document (if any). Or else, he can click on Cancel.
  • The entire conversation that happens between the customer and the support agent appears in the form of a thread in the lower section of the case details page itself. For instance,

convergehub
Feed Tab
You can view all the updates/comments on the Case through the Feed tab.
convergehub

  • You can share link from the convergehub option.
  • You can write your own comment in the comment box and share it with other users by clicking on the convergehub button.
  • You can comment on others comment by clicking on the convergehub link. You can further edit or delete the comment as required.
  • Like and unlike can be posted on Comments by clicking on the convergehub or convergehub option.

Create a new Lead – different options of creating leads

In ConvergeHub, you can create leads by three processes:-

1.Entering data in the lead details form

You can manually fill the Lead details in the CRM gathered from various external sources, e.g. meetings, trade shows, exhibitions, business cards, etc.

You can manually create leads in two ways:

  • Create Leads in Full View: This involves a comprehensive procedure where you can add detailed information of the lead through seven different sub tabs (general, address, sales process, other, social links, tags and goal) which have their own corresponding fields.
  • Create Leads in Quick View: During meetings or when traveling, whenever you meet a person who shows some interest in your product or service, you can instantly add their details in the CRM in a few minutes.

Later, you can add more details to the lead through the ‘full view’ lead creation process.

2.Importing leads from external sources

You can import leads in bulk into ConvergeHub from your CSV files stored in your local drive.

3.Web to Lead Forms

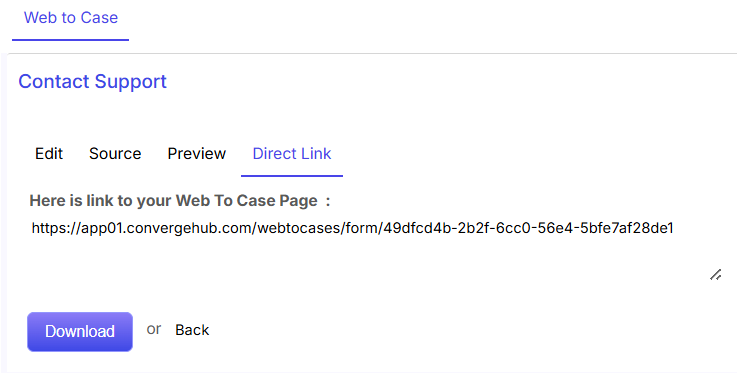
You can capture leads directly from the website through web to lead forms. Website visitors who submit their contact details or questions through these forms, their details will get captured directly in the Leads module of the ConvergeHub application. Plus the imported leads will get automatically assigned to any one or multiple of your sales agents.

In what holds further is a detailed step-by-step visual explanation of the above-mentioned lead creation processes:

1.Entering data in the lead details form

A) Create Leads in Full View

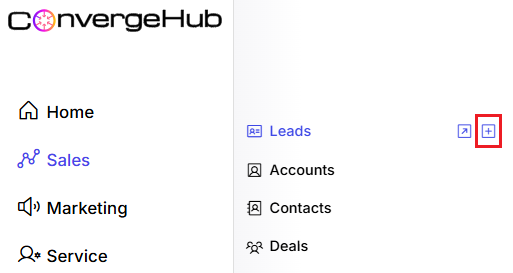
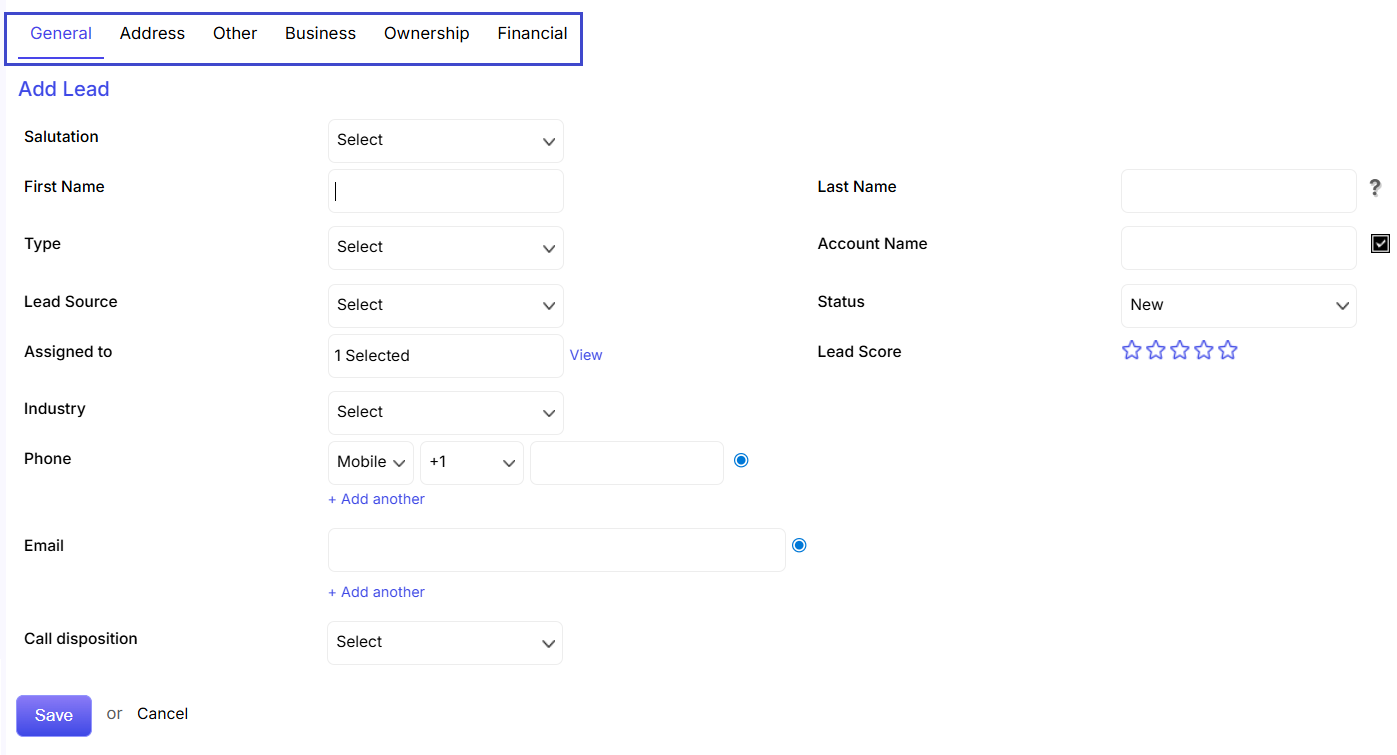
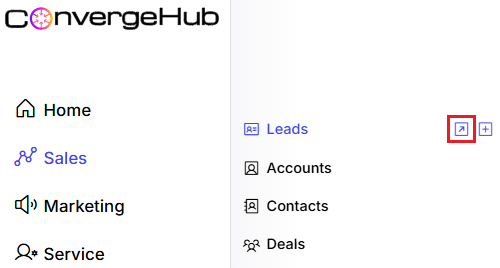
New lead in full detail can be added by clicking on the “+New” button in the upper right corner of the lead listing page. Simultaneously you can create a new lead in full detail by hovering the cursor on the Leads option under the Sales module and clicking on Create Lead in Full View.

Detailed information of the lead can be added through different sub tabs (General, Address, Other, Business, Ownership, Financial) which have their own corresponding fields. You can add/modify the tabs as per your business requirement.

    B) Create Leads in Quick View
    You can create new lead in shortcut by hovering the cursor on the Leads option under the Sales module and clicking on Create Lead in Quick View.

    You can quickly fill out the essential lead details and click on Save button.

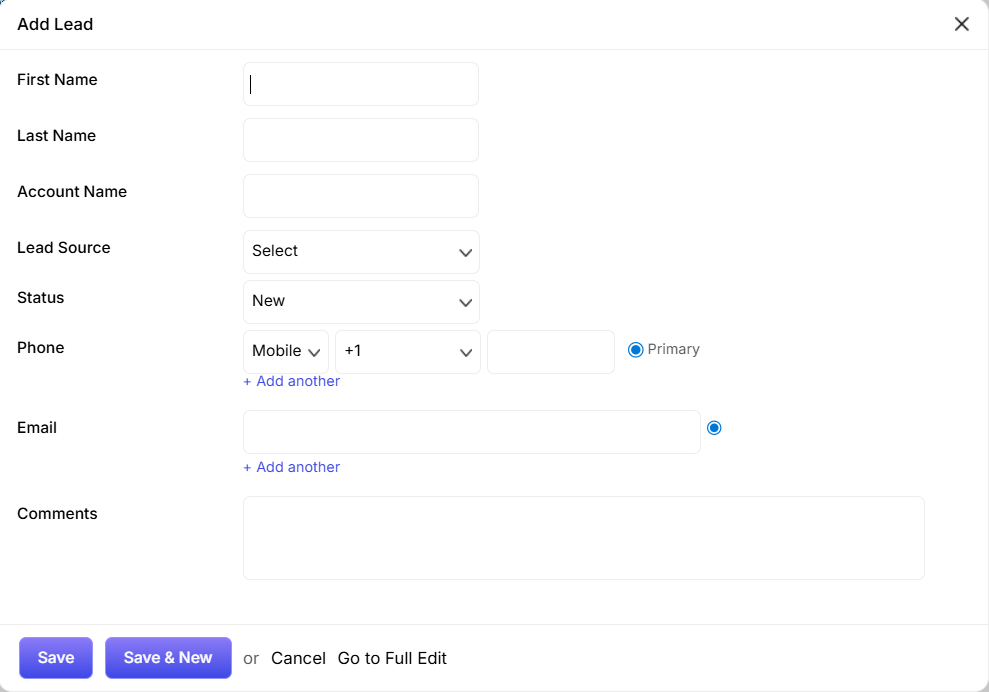
    • Fill in the First name of the lead
    • Fill in the Last name of the lead
    • Fill in the Lead-related account name here
    • Select the Lead source
    • You can set the Lead status from the drop down menu.
    • Enter the Primary Phone number.
    • Enter the Primary Email address.
    • Enter the Comments in relation to lead creation.
    • Click on Save to complete the process. Or else, Click on Cancel.


    2. Importing leads from external sources:
    Go to Tools and select Import

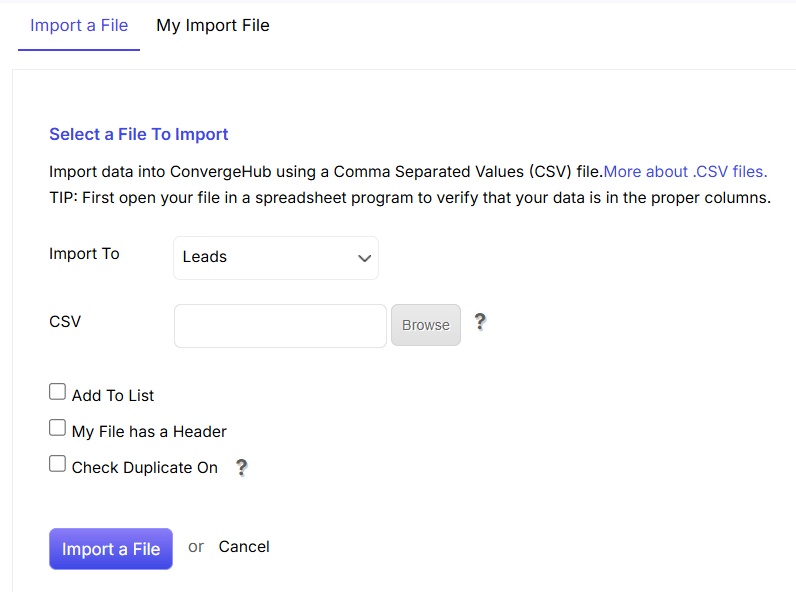
    Import To: Choose the option Leads as the field that you want to import the data to.

    Browse: Click on browse for the file that you want to import.

    Add To List: By clicking the check box beside Add to List option, you can select an existing list to which you want to import the file. You can also create a new list by clicking on the “+Add New” option.

    My File has a Header: If your CSV file has one/more headers, then you are required to select the check box. Doing this will help the CRM to map the data according to the headers in the CSV file.

    Check Duplicate On: You can check for duplicate entries using ConvergeHub’s smart duplicate checking functionality. When you click on Check Duplicate option, you get the option of selecting the fields for which you want to use the duplicate checking intelligence. Example – Name, Phone, Email etc. Also, you will have to select whether you want the system to ignore the duplicate contacts or update them with the information from the list.

    Click on “Import File” to import the list. Click on Cancel to stop importing the data.


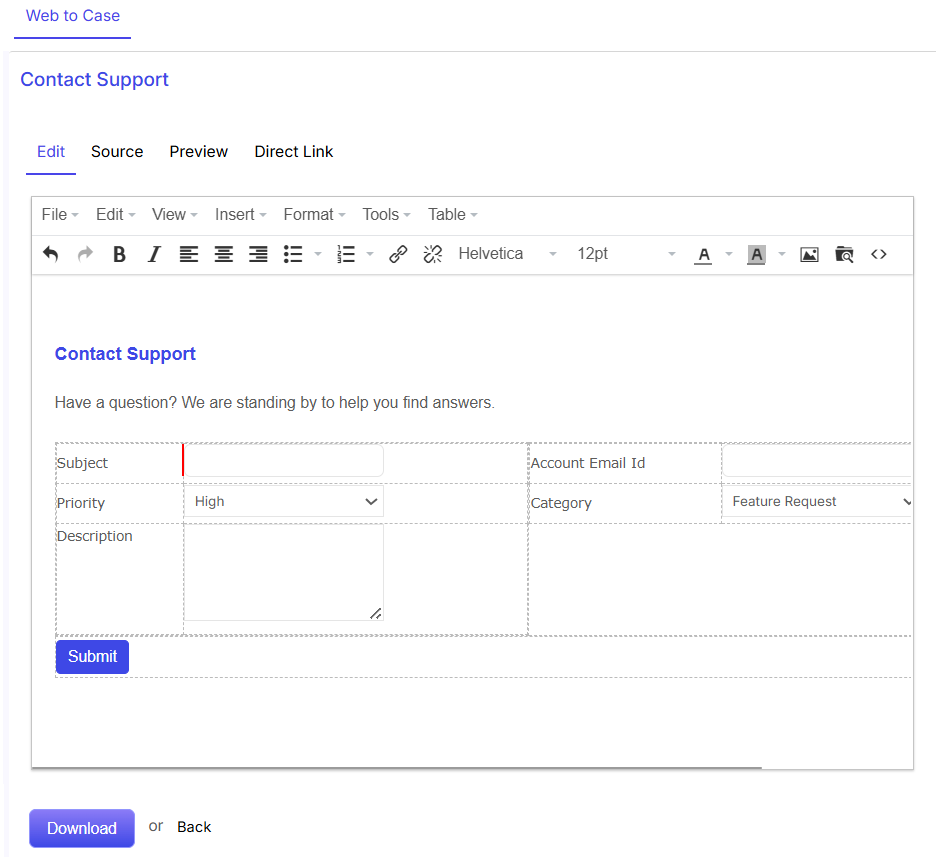
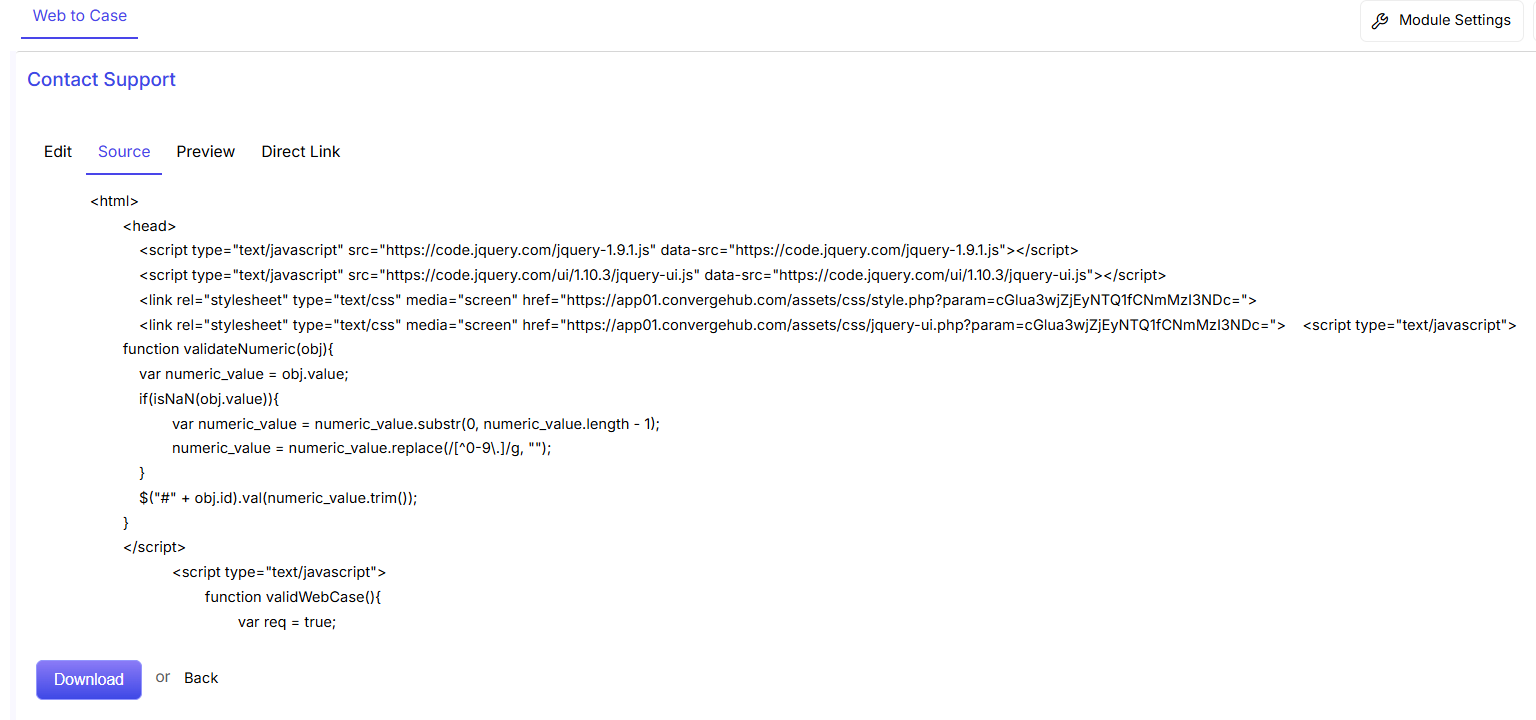
    3. Web to Lead Forms

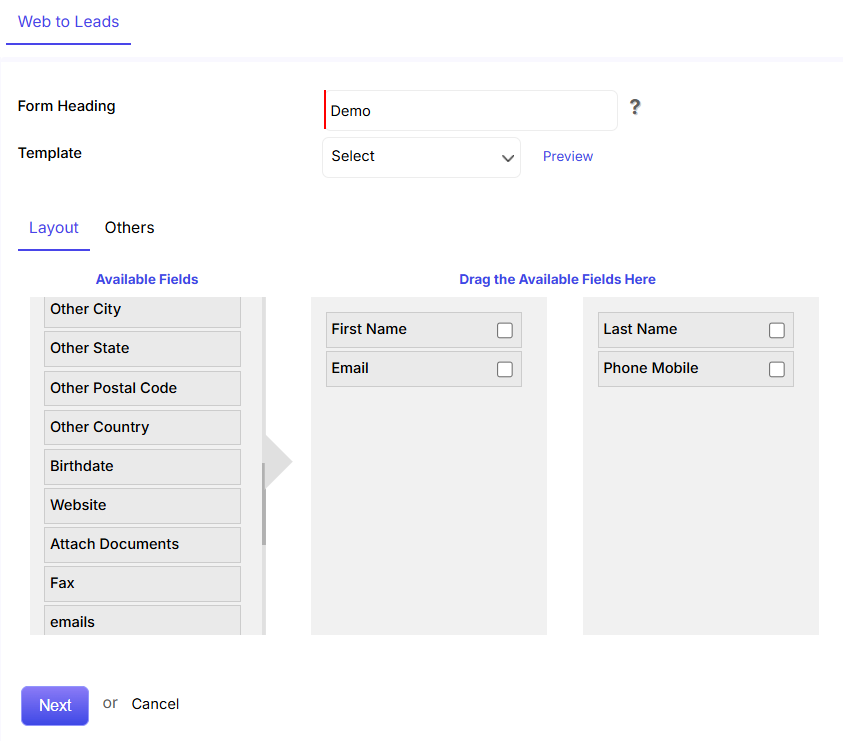
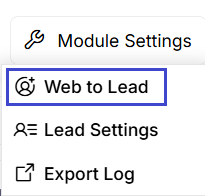
    From the Leads module, proceed to ‘Module Settings’ on the right. Upon hovering, select ‘Web to Leads’. A new Web to Lead form can then be added by clicking the ‘+New’ button, situated in the upper right corner.


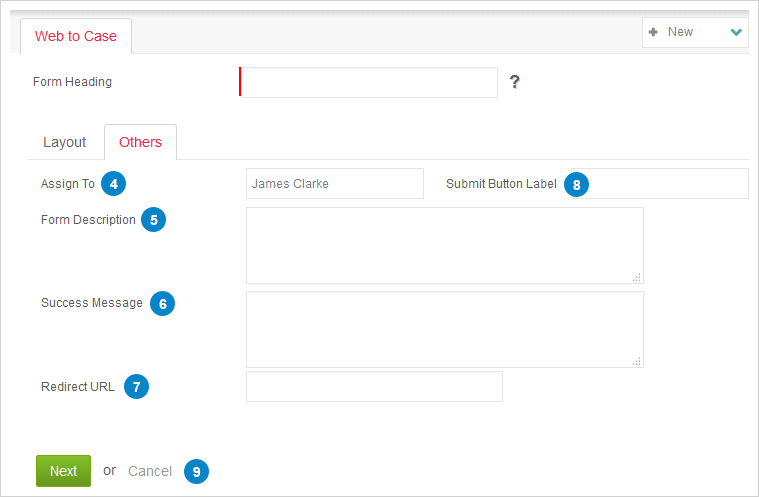
    Detailed information to the Web to Lead form can be added through two sub tabs (Layout and Others) which have their own corresponding fields.

    Add New Web to Case

    Using the Web-to-Case functionality, ConvergeHub users can gather customer support requests directly from their company’s website . Setting up Web-to-Case involves creating the form, setting the form description, message, redirected URL, assigning a customer support professional, submitting button label and finally adding the Web-to-Case form to the website.

    New Web to Case form can be added by clicking on the “Add New Web to Case” link in the left panel or by clicking on button in the upper right corner of the Web to Case listing page. Detailed information to the Web to Case form can be added through two sub tabs (Layout and Others) which have their own corresponding fields.

      • Write the form name (compulsory).
      • Under the layout section drag and drop the required fields which you want in the form.
      • Under the Others section, you can perform the following functions:
      • Select the customer support professional to whom you want to assign the cases to.
      • Set the form description.
      • Frame the success message which will appear to the customers post the successful submission of the form.
      • Give the URL of the website page where you want to take the customers after the submission of the form.
      • Frame the text to appear on the form submission button.
      • Click Next to Preview the form created.

    Click on Edit to make changes in the text of the form.

    Customize the form by making changes in the Source code.

    Click on Direct Link to copy paste the code into the website back-end.

    Click on Download option to open the form HTML page. Or else, click on Back to recede.